Hey there, content creator! In the fantastic world of social media, using unique video effects can make your content stand out. Have you ever wondered about creating a fun, reversed video to share on your social media platforms like TikTok, Instagram, or YouTube? Do you even know the app that can help you with that?
Wonder no more because you’ve come to the right place! Today, we’re going to show you how to reverse a video on your iPhone using the awesome CapCut app. So, sit tight and enjoy the ride!
Table of Contents:
Before we jump in, let’s talk a bit about CapCut. This fantastic video editing app is developed by ByteDance and it’s perfect for both newbie and pro content creators. With a variety of editing features and an easy-to-use interface, CapCut allows you to bring your creative video ideas to life. Of course, one of the coolest features is the reverse effect.
As someone who spends a lot of time editing YouTube Shorts or TikTok videos, I found that the CapCut app is very intuitive, and has a lot of options that can make your video look amazing in no time. It is worth a try, so I hope you will like it as much as I do.
Now, let’s get to the exciting part! Follow these steps to find out how to reverse video on iPhone using CapCut.
Step 1: Install CapCut on Your iPhone
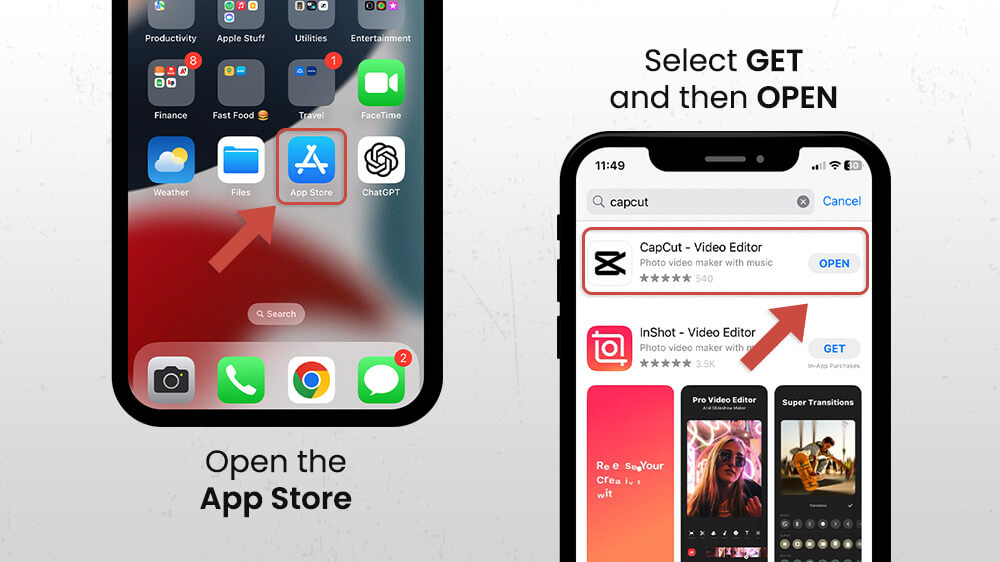
First things first, you’ll need to get the CapCut app. It’s super easy. Open the App Store on your iPhone, type in “CapCut”, and select GET, or OPEN, if you already have it installed. That’s step one complete!
Step 2: Open CapCut and Create a Project
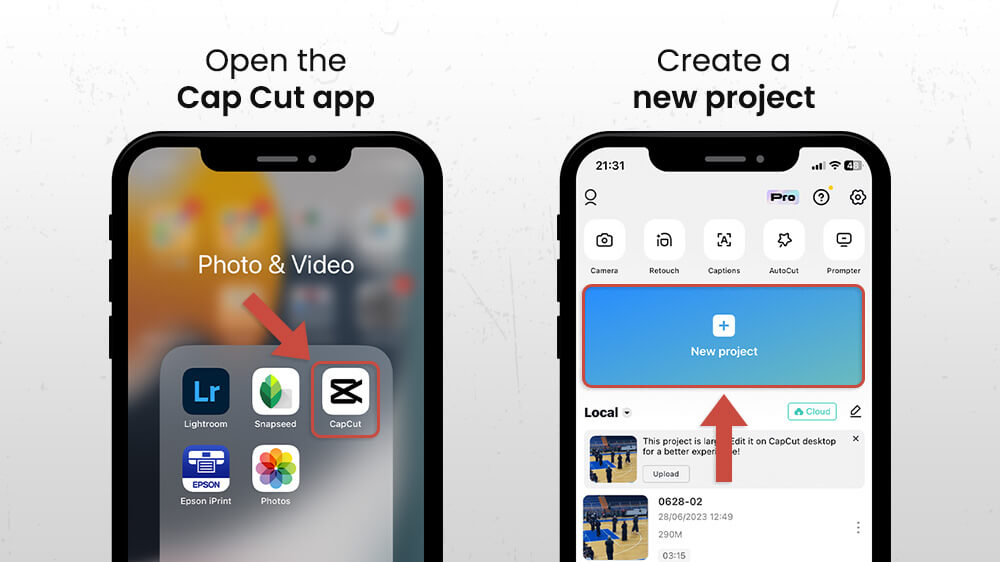
Once you’ve installed CapCut, it’s time to open it up and get started. Tap on the “+” sign to create a new project.
Step 3: Add the Video to the CapCut app
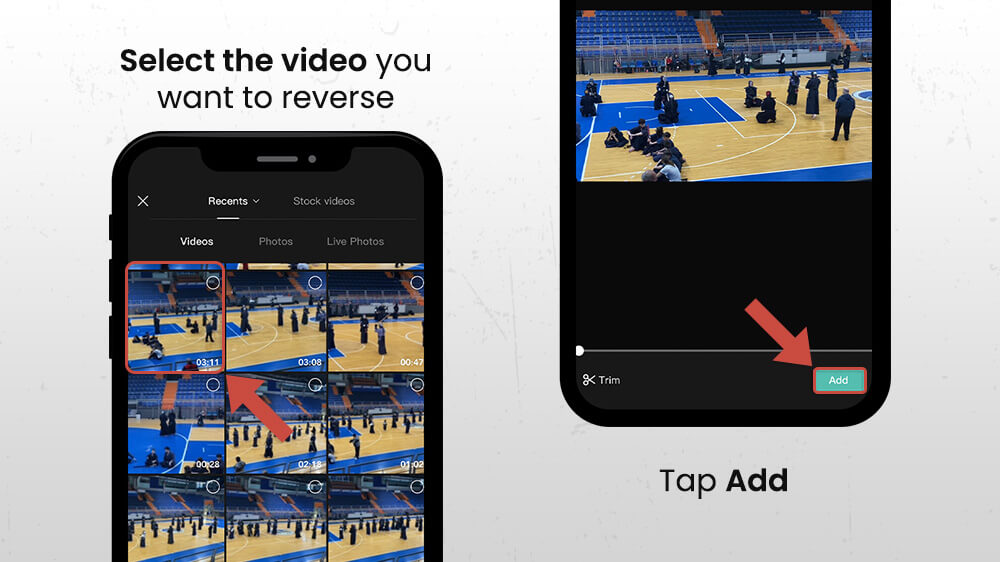
Now it’s time to select the video you want to reverse. Just pick it from your camera roll and tap “Add” at the bottom left. At the bottom right corner of the screen, you also have the option to trim the video, if it is too long.
Step 4: Choose the Reverse Effect
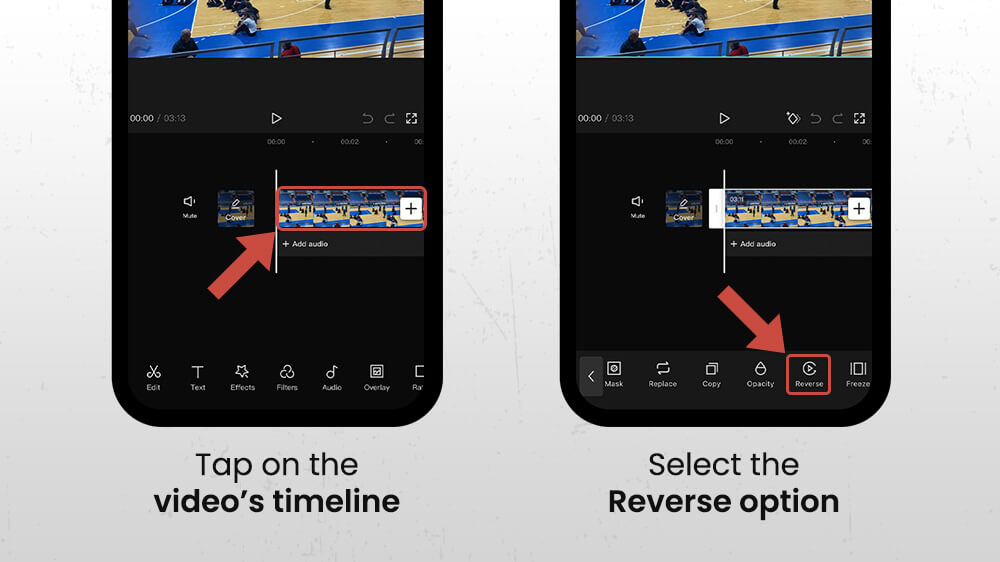
Once you’ve picked your video, it will show up in your media library inside the CapCut app. Tap on the video’s timeline to open up a bunch of editing options at the bottom of your screen. Swipe left and select the “Reverse” option. It is one of the last effects, so don’t lose hope if you can’t find it!
Step 5: Wait for the Reverse Process to Finish
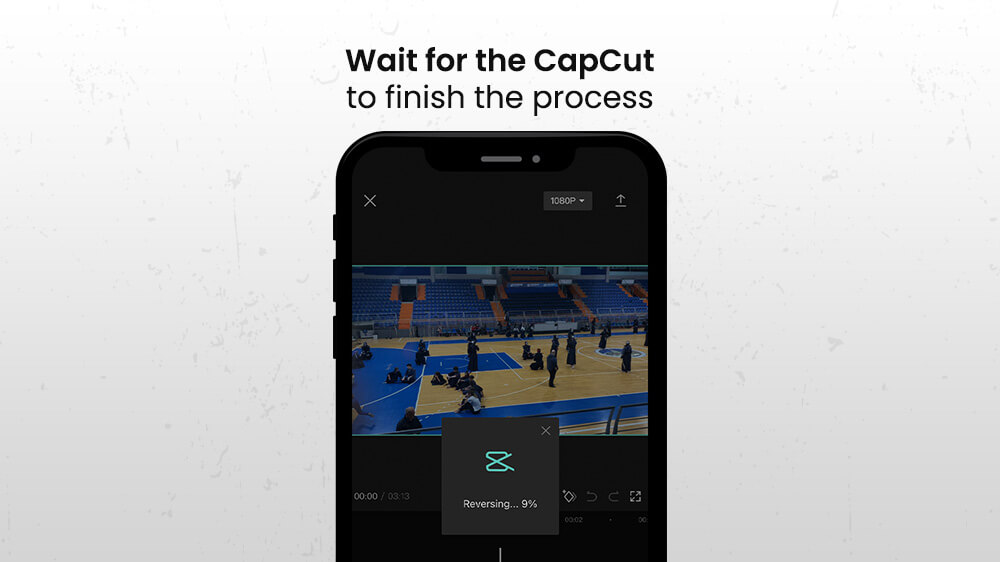
This is the most boring process, I know, but it is not skippable. Wait for the CapCut to finish reversing your video for some time. If the video is short, it will not take more than a few seconds to finish, but if it is longer, leave your phone and go on a short break!
Step 6: Preview, Adjust, and Save Your Video
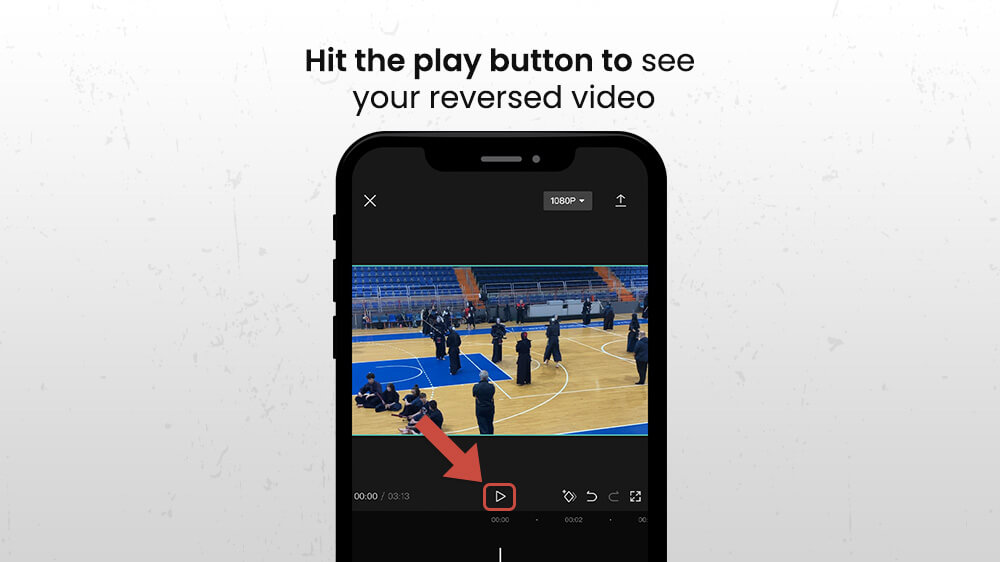
Once you’ve applied the reverse effect, it’s time to check out your masterpiece. Hit the play button to see how your reversed video looks. If it’s just how you wanted, let’s move to the next step. If it isn’t, you can reverse changes by selecting the Undo button, and try again.
Step 7: Save and Share Your Masterpiece
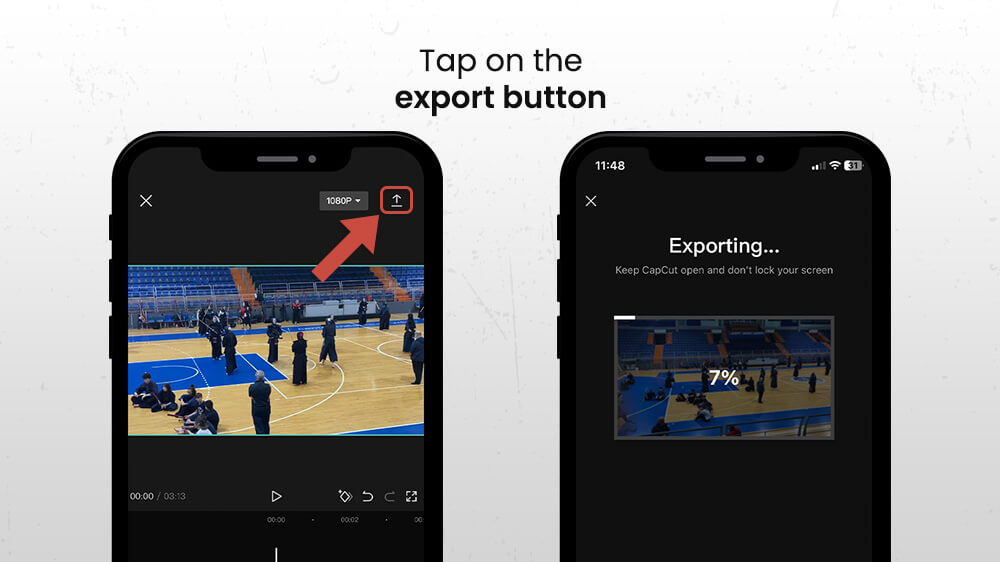
Now, tap on the “Export” button at the top right corner to save your reversed video. It will go directly to your camera roll.
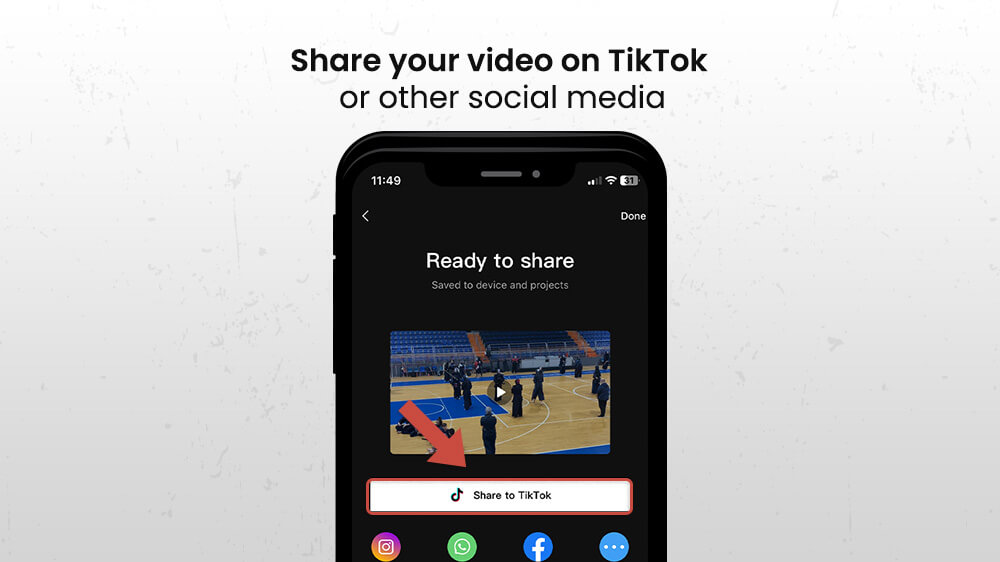
From there, you can share it on any social media or video-sharing platform you want.
Let your creative work shine and make sure to check other cool effects for your videos!
And there you have it! You now know how to reverse a video on your iPhone using CapCut. It’s a simple process, but it can add a lot of fun and creativity to your videos. But don’t stop at just reversing videos. CapCut has many more editing tools and features you can use to spice up your content. So, feel free to explore!
Just remember, apps often get updated, so make sure you’re using the latest version of CapCut. This way, you can stay in tune with any new features or changes. Now that you know how to reverse a video on iPhone with CapCut, what are you waiting for? Get out there, download CapCut, and start making some awesome videos! Also, make sure to check other smartphone tutorials on our website. Happy editing!
