If you aren’t a big Facebook user, you are probably still using the Facebook Messenger app. With over 5 billion downloads from the Play Store, it’s one of the most beloved chatting apps out there. The design of the app stands out above all else, and its most famous design innovation is the Facebook Messenger chat heads function.
By chat heads, we are of course referring to the bubble notifications that pop up when you receive a message on Messenger. The Messenger app is also available for computers, but it, unfortunately, isn’t equipped with chat heads. Neither is the Messenger Lite app, the lighter version of Messenger convenient for mobile devices with less storage space.
As for the chat head function on iOS devices, it still doesn’t work the way it should. There has been news that a beta version of Messenger has been released in Vietnam, equipped with the chat head function. However, this is not proven, and we may need to wait a while longer. If you enjoy experimenting with your device, you can watch TheUnlockr’s tutorial on YouTube on activating Messenger chat heads on iOS.
Since this is such a popular app, we have decided to write this simple tutorial for those not familiar with Facebook chat heads and others who want to know more:
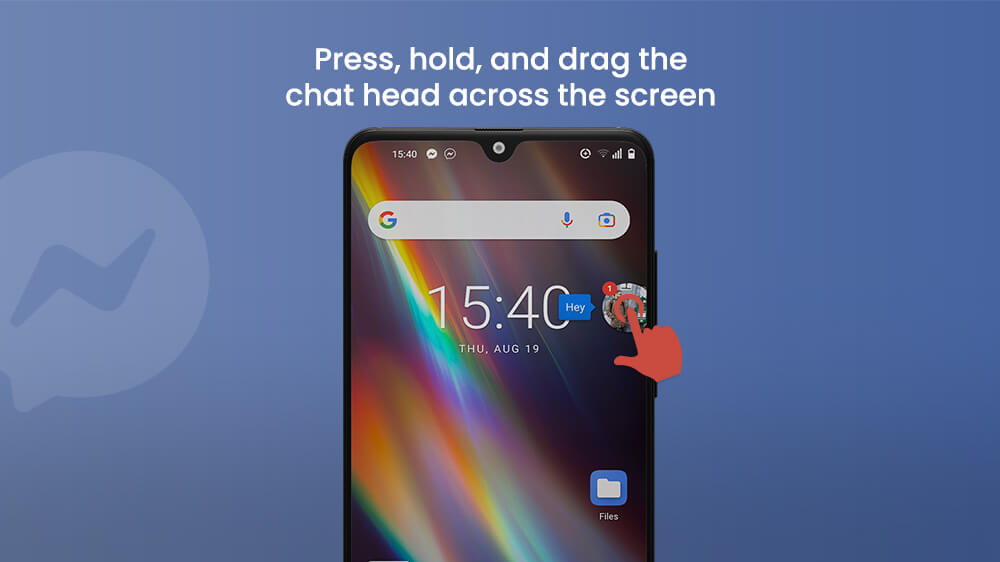
A FB Messenger chat head will pop up on the home screen of your device if you are connected to the Internet. You can move the chat head around by pressing on it, holding it, and dragging it across the screen.
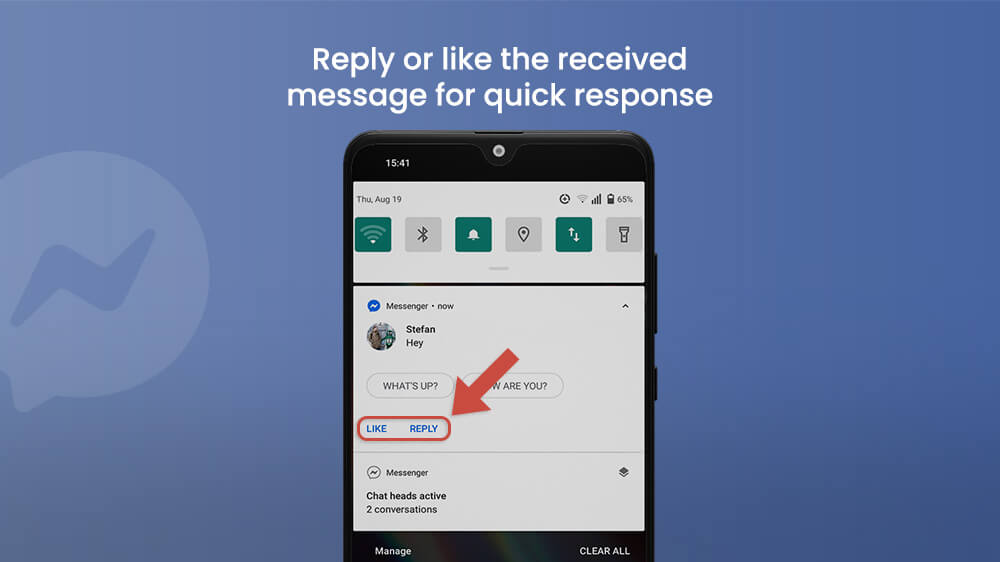
If you don’t want to open the chat, you can read the content of the message in the control center of your smartphone. You have two quick access buttons in the control center notification. Tap reply and type, or like the received message for a quick response.
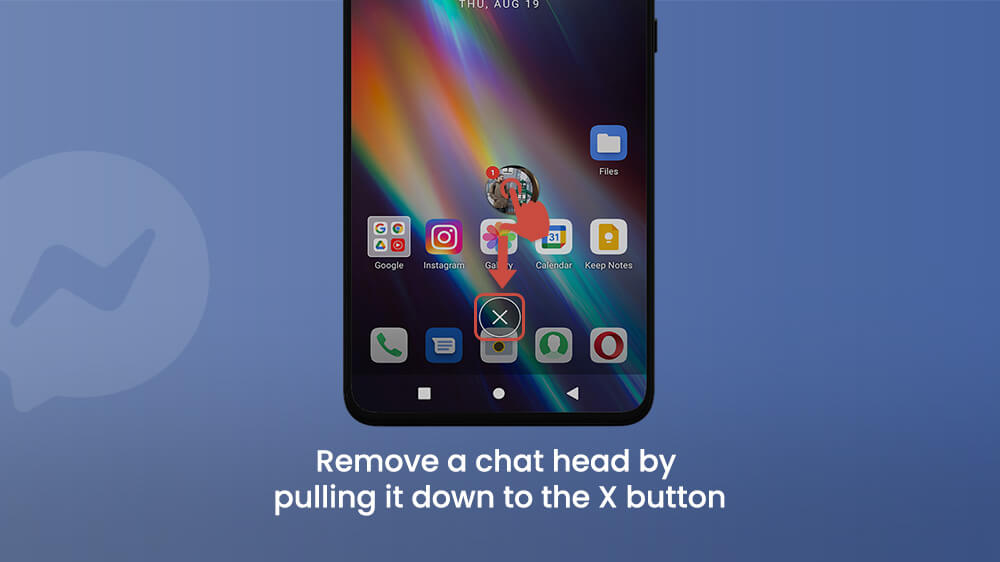
To remove a chat head from the screen, press and hold it, then drag it down to the bottom center of the screen, on the X.
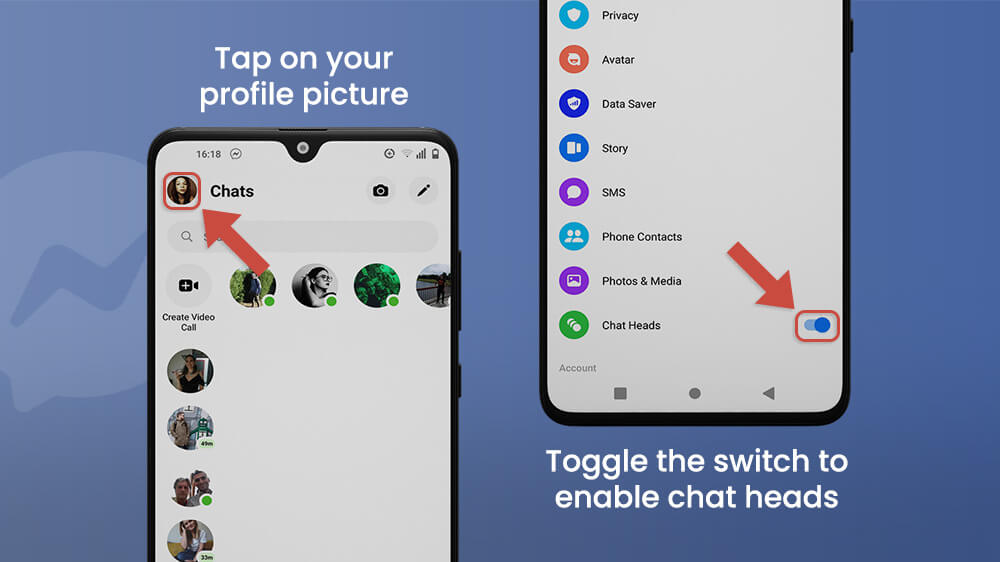
To begin with, open the Messenger app on your smartphone device. Tap on your profile picture in the upper-left corner of the screen. Scroll down the menu and find the Chat Heads option. Toggle the switch until it turns blue to enable chat heads, or toggle it until grey to disable them.
Turning off chat heads is a good option for those situations where you don’t want other people accidentally seeing who you are chatting with, or if chat heads are a distraction while doing important work on your smartphone.
Chat heads should always appear when you receive a message from your Facebook friends, or in a chat group of which you are a member. This does not include message requests, and messages you receive from people you are not friends with on Facebook.
If chat heads are not popping up, you can clear Messenger cache files on your smartphone.
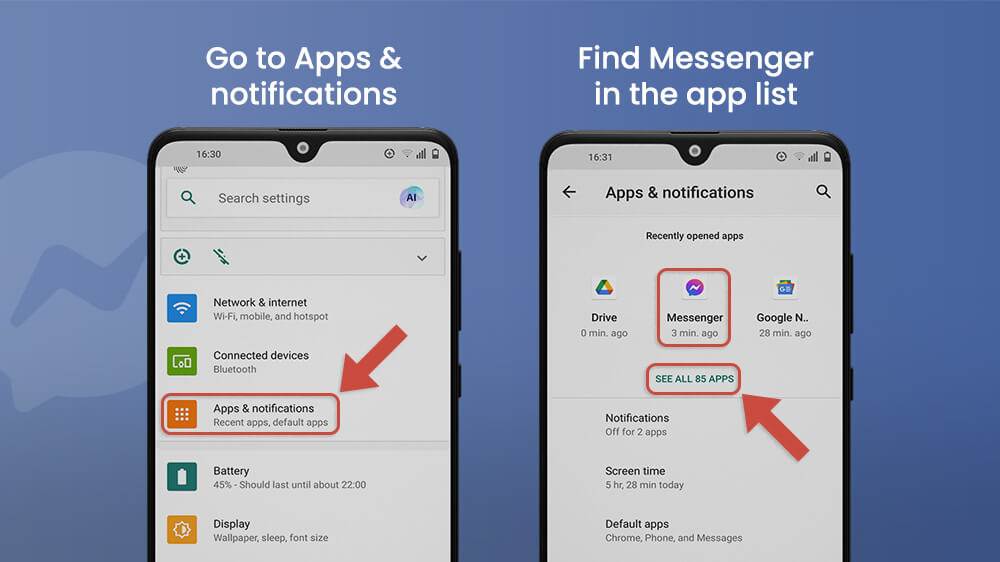
To do that, open the Settings on your mobile device. The interface may be slightly different depending on the model of your phone, but you want to find the category titled something like Apps & notifications. Then find Messenger in the list of apps you have and tap on it.
Tap the Storage & cache option, and tap the Clear cache button.

If clearing cache files doesn’t help, you could uninstall and reinstall the Messenger app. Keep in mind that you will need to input your login information after that to use the app again.
Even though Facebook has become a controversial social media platform, Messenger remains widely used. The chat head function is unique, bringing speed and efficiency to online communication. Chat heads are user-friendly and make chatting even more fun. There’s something satisfying about seeing chat bubbles pop up and dragging them effortlessly across the screen.
So we hope this article succeeded in helping you fix any issue you had with the app. We are looking forward to this nifty function becoming available on iOS devices, and you can be sure that the Smartphone Tutorials team will keep you updated.