Android smartphone owners love their handy devices because they can be used for a plethora of purposes – gaming included. However, did you know that you can connect your PS4 controller to your Android smartphone and use it to play games? In this article, we’ll show you exactly how to pair a PS4 controller with an Android device quickly and easily.
The best thing about this guide is that you do not have to root your phone or use complex software. All you need is Bluetooth, the Android device, and a PlayStation4 controller with wireless settings. That’s all.
Table of Contents
Connecting a PS4 controller with Android phones is easy and lasts only a handful of minutes. Essentially, it is done via Bluetooth, so if you ever connected your phone to wireless earbuds to listen to music on YouTube or use Zoom, you already know the drill.
The first thing you should know is that your wireless controller and PS4 should be turned off.
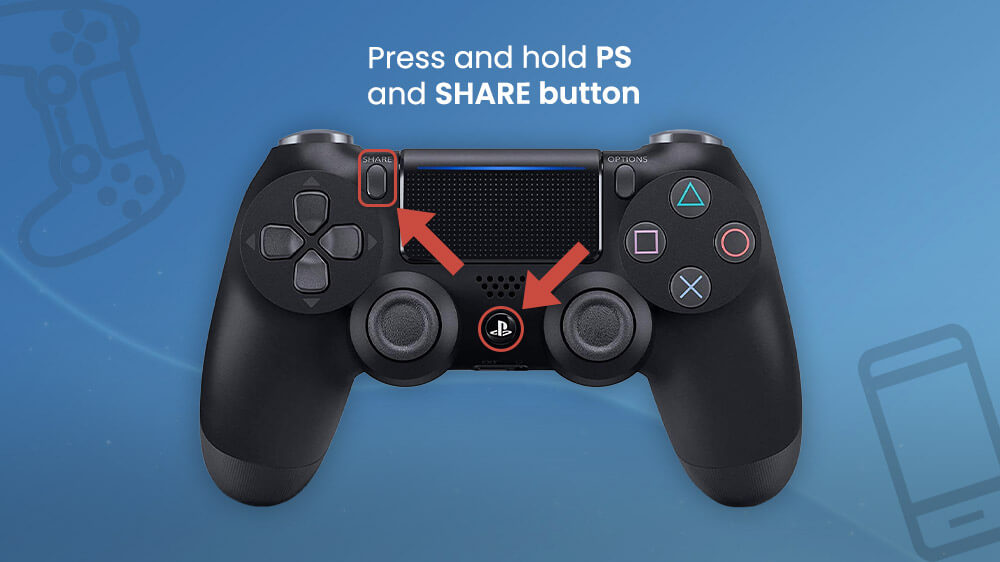
- Set your controller to pairing mode by pressing and holding the PS button and the Share button. The light on the back of your controller should flash white light to indicate you’ve turned the Pairing mode properly.
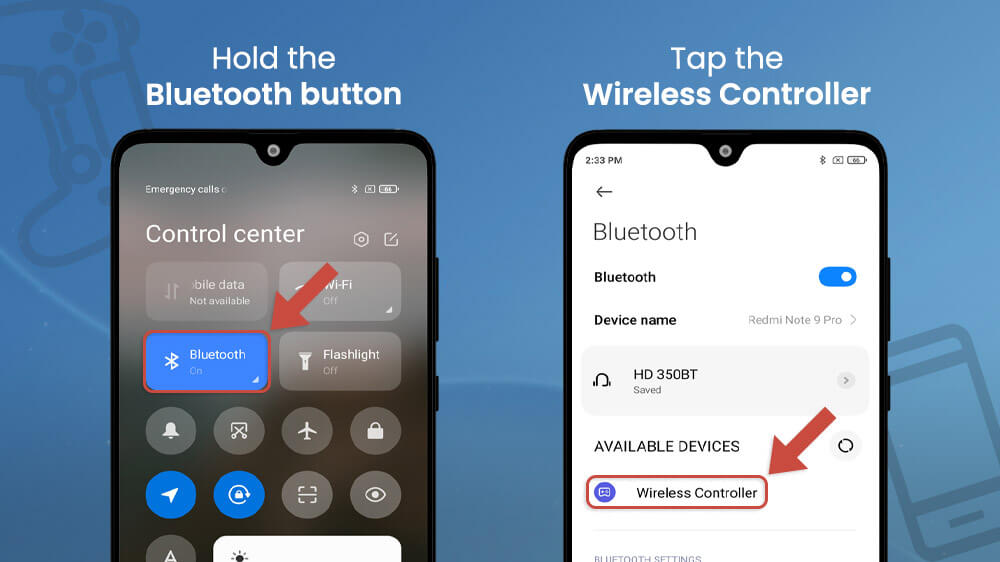
- Then go to Bluetooth settings on your device by opening Settings or swiping the quick settings menu from the top of your screen.

- Turn on Bluetooth and browse Available Devices by holding the Bluetooth button. The controller should be discoverable and appear in the Available Devices section under the name ‘Wireless Controller. Tap on it. If you cannot see it, tap Scan to refresh the pairing options.
- Tap on the Wireless Controller to pair it with your Android device. Once the pairing is done, tap on OK to confirm the connection.
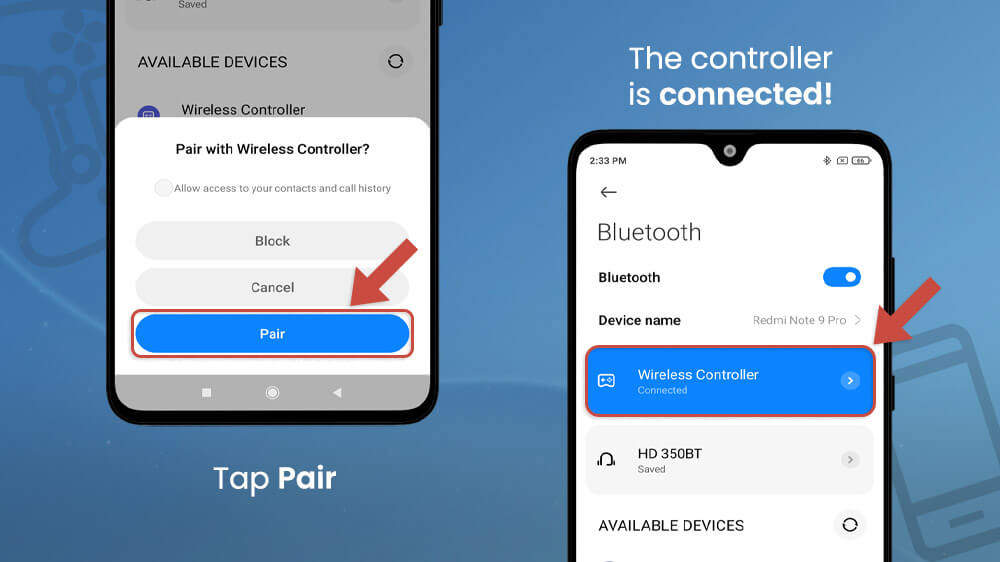
The device should be instantly paired with your controller, and you are now able to use it to play games. It is important to note that not all mobile phones can connect with wireless PlayStation4 controllers – only Android 10 or newer Android OS phones can pair with PS4 controllers via Bluetooth.
When you start playing games via the PS4 controller on your smartphone, you might notice that not all game controls to suit the game you are playing. The problem may be in the external controller optimization, as not all games have the proper external controller support. However, there is a way to fix that.
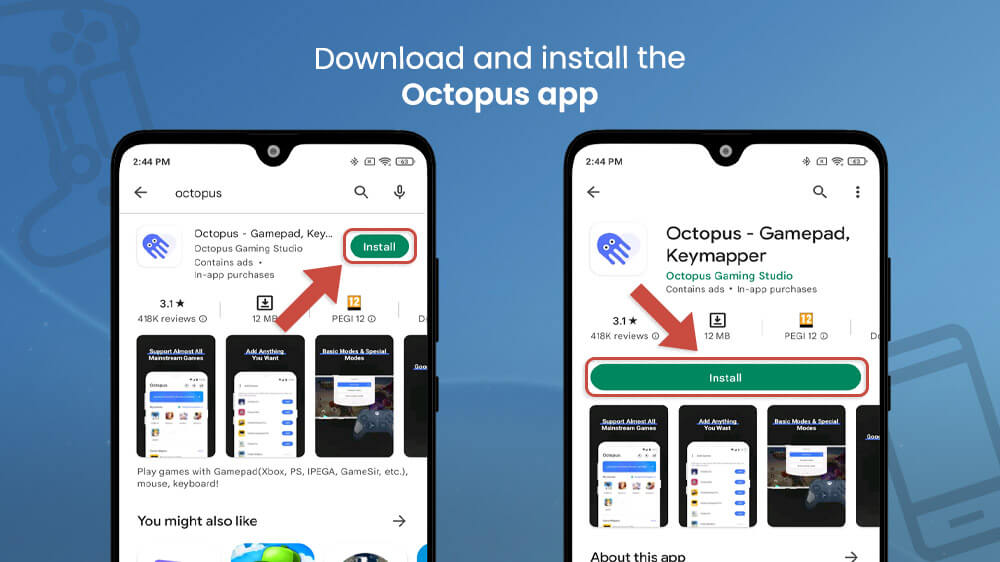
To adjust all game controls for each specific game, you can download an app from the Play Store called Octopus. Here is a step-by-step process of remapping game controls on your Android device for a PS4 controller.
- Open the Google Play Store app.

- Download and install the Octopus app from the Play Store.
- Open the Octopus app.
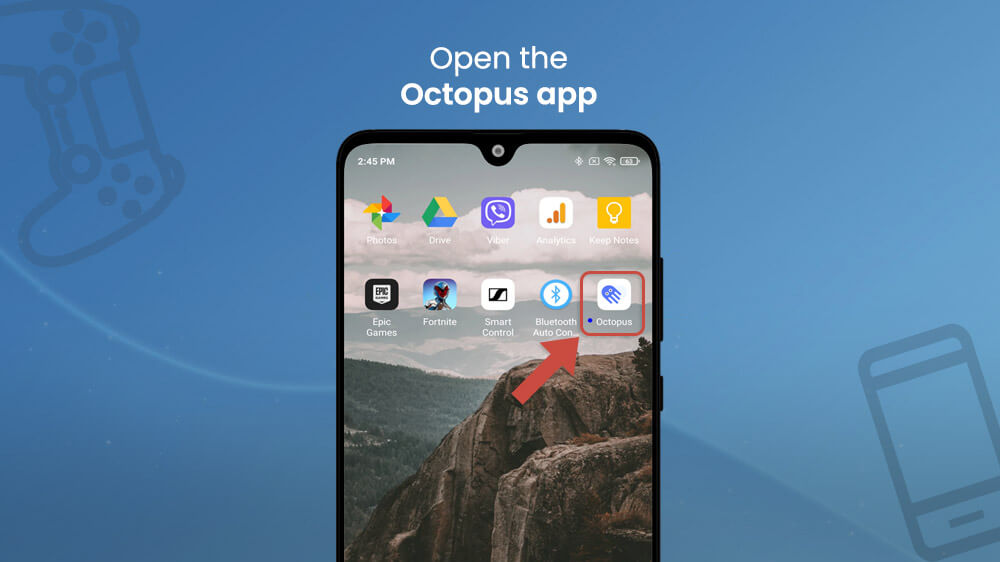
- Tap the plus icon.
- Search the game you are currently playing that requires control customization and tap Add.
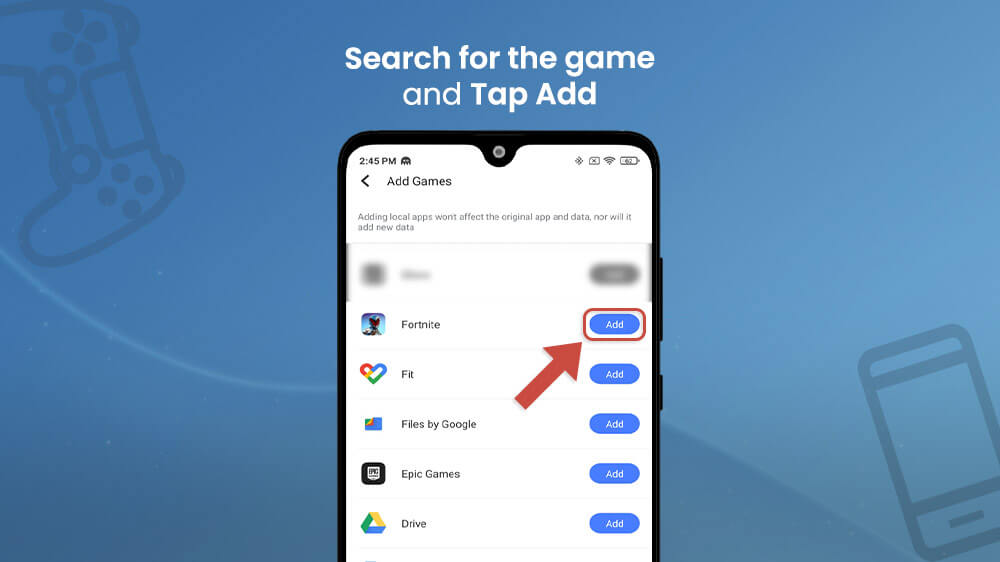
- Once you’ve added the game(s) you’d like to customize controls for, tap on the game icon within the Octopus app and confirm by tapping on Allow.
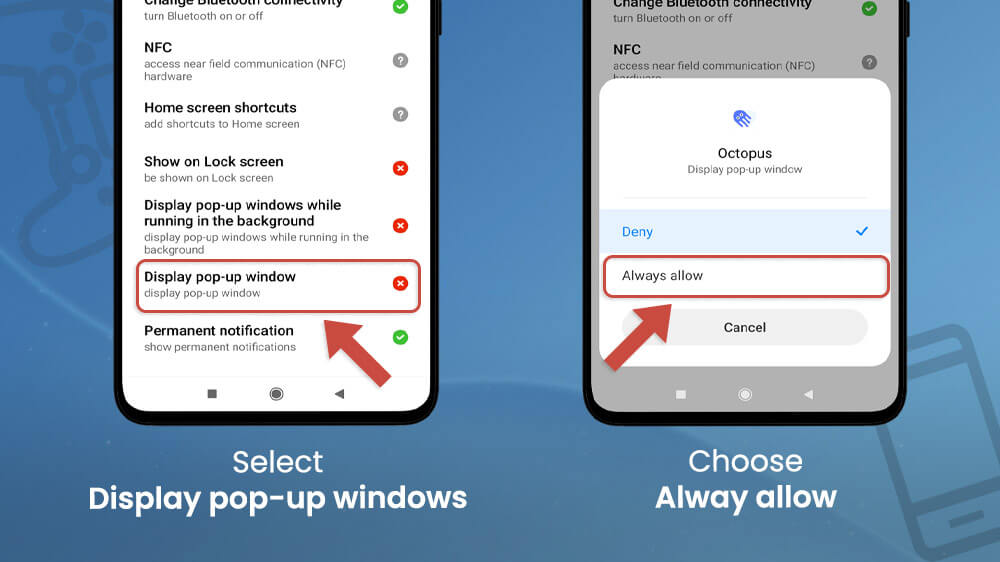
- You will need to select Display pop-up windows, and then choose Alway allow to continue. Go back.
- Open the game and tap on the octopus icon at the top.
- Select I know. If your game needs any updates, do it before opening the Octopus app. Don’t be like me!

- Remap your controls however you want.
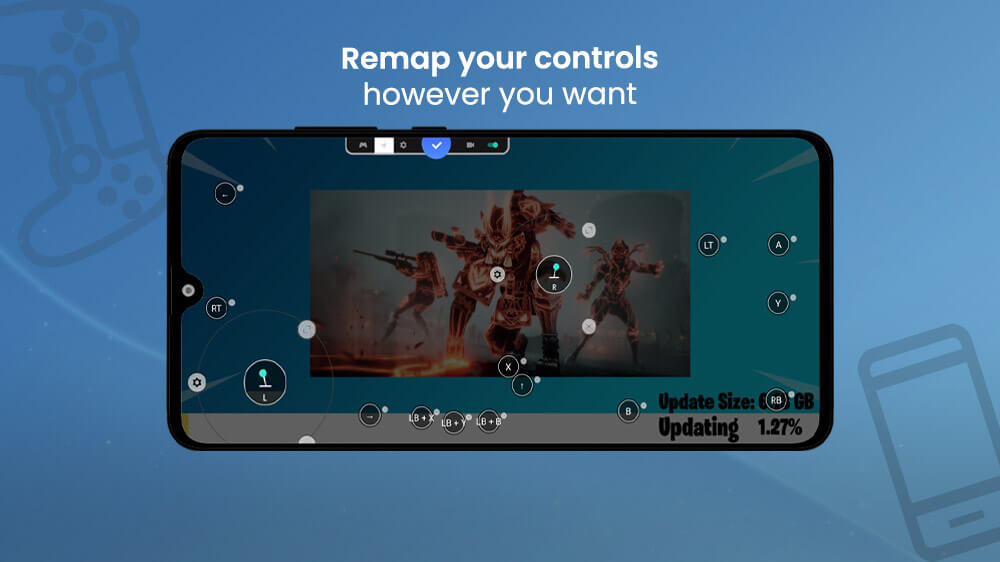
- Once you complete all the key remapping you want, you can play the game on your Android device with your PS4 controller.
This app is especially handy if you are used to a certain pattern for the keys on your wireless controller. We recommend using it for any game you like that has different settings than the ones you are used to.
Wireless gadgets, including controllers, are an excellent way to enhance your gaming experience. However, everything that’s wireless (and goes via Bluetooth) may occasionally run into problems. That should be rare, but it still happens.
If your controller is having problems connecting to your Android device, you can download an app that solves the connection issues. It eliminates lag issues and helps you have an immersive, seamless experience on your Android device.
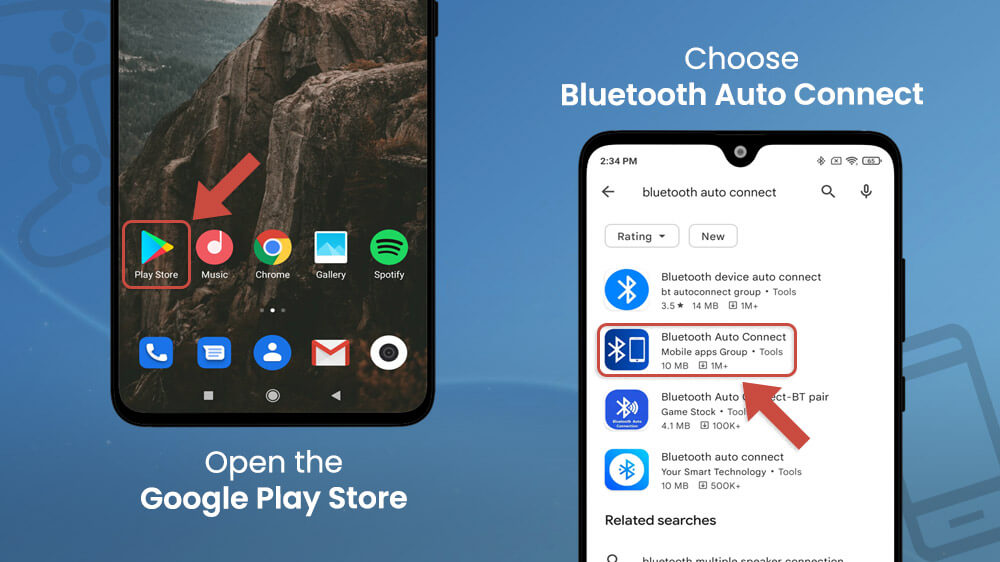
- Open the Google Play Store and look for the Bluetooth Auto Connect app.
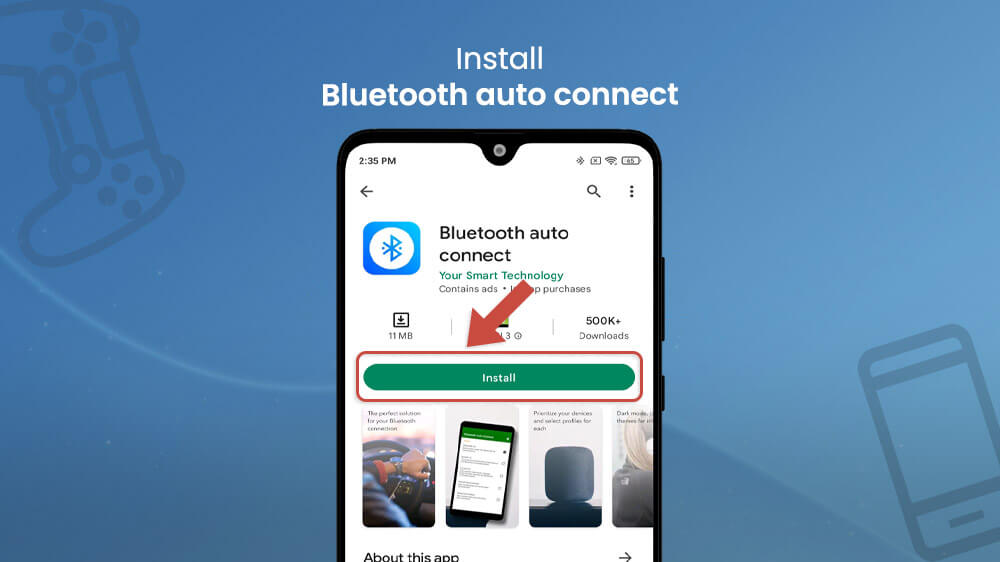
- Download and install it.
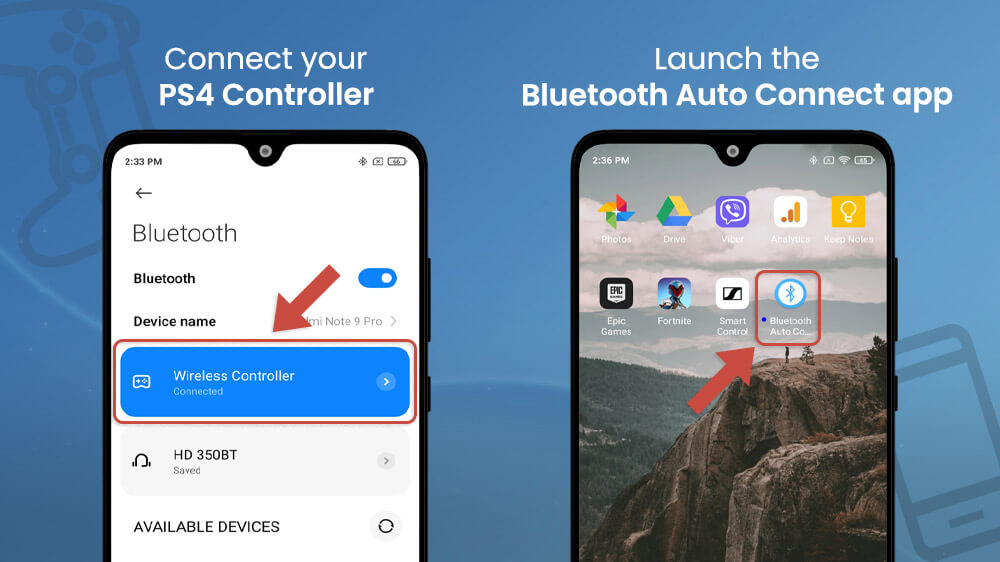
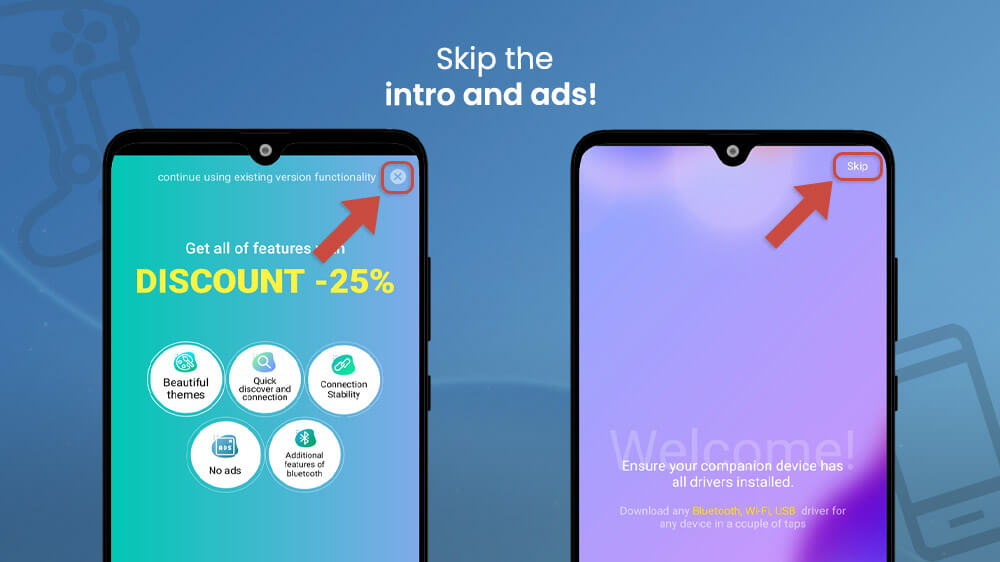
- Connect your Android device to the PS4 controller and launch the Bluetooth Auto Connect app. When you open the app, tap on the X button to continue using the existing version functionality.
- Skip the intro and ads!
- Within the app, tap on Advanced Options at the bottom, and then tap on Continuous Connect (Sec).

- The option will give you a choice to enter a number. Enter any number you want between 2 and 10 and then tap on OK.

The app will maintain a connection between your device and the wireless controller for as long as you want it. If you decide to change the numbers, you can do so anytime you want by opening the app and repeating the steps described above.
Did you have fun playing games on your Android phone using a PS4 controller and now wish to disconnect? Not a problem! Here is a guide for disconnecting the controller that allows you to pair it with your PS4 console again.
- Open your Bluetooth settings on your phone by either opening Settings and searching for Bluetooth, or by swiping the Bluetooth settings from the quick menu at the top of the screen.
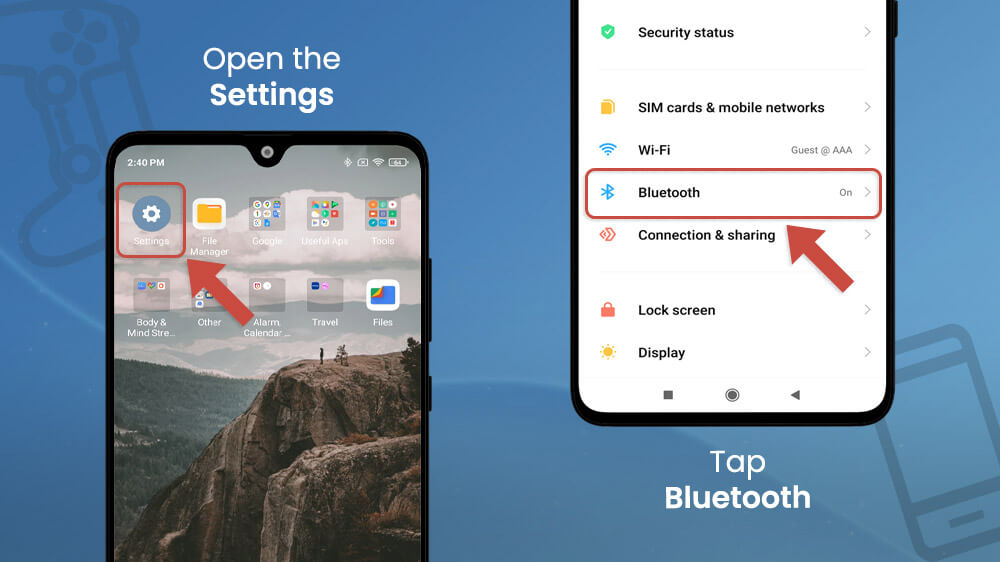
- The settings will display your current connection to the controller. Tap and hold the Wireless Controller to open settings for the pairing.
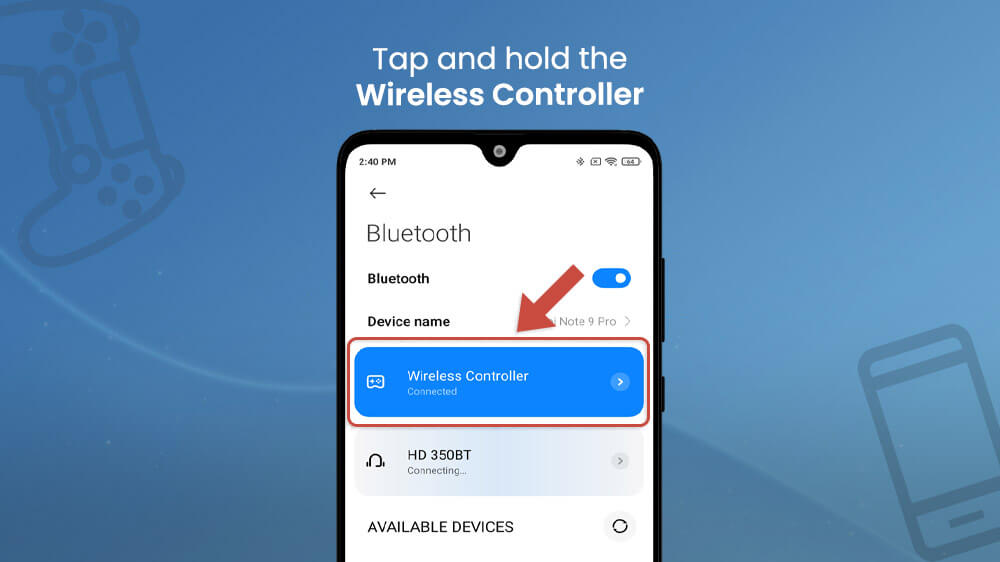
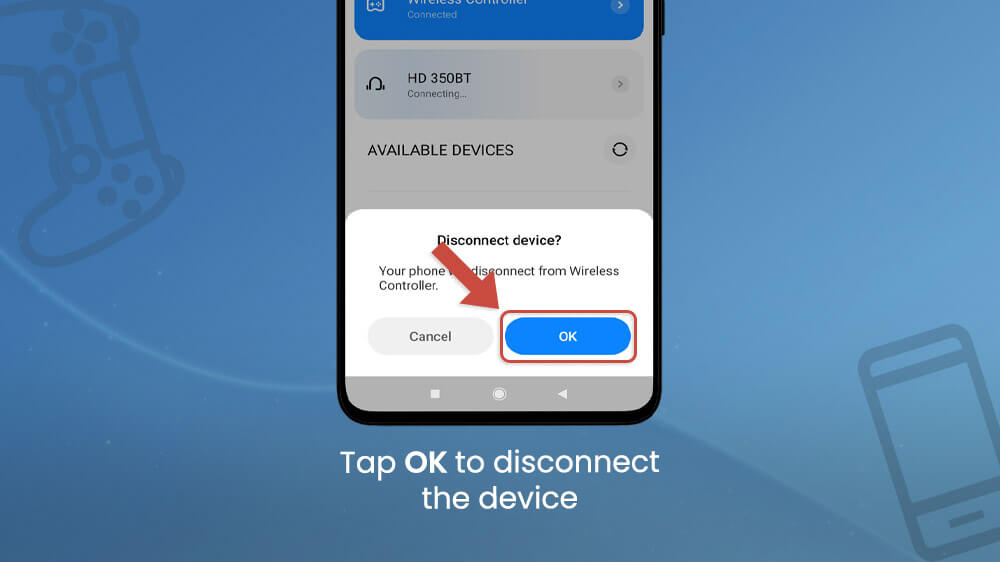
- You should tap on the Disconnect button, which will end the pairing between the two devices. If you are using Xiaomi, it will ask you to disconnect the device. Tap OK.
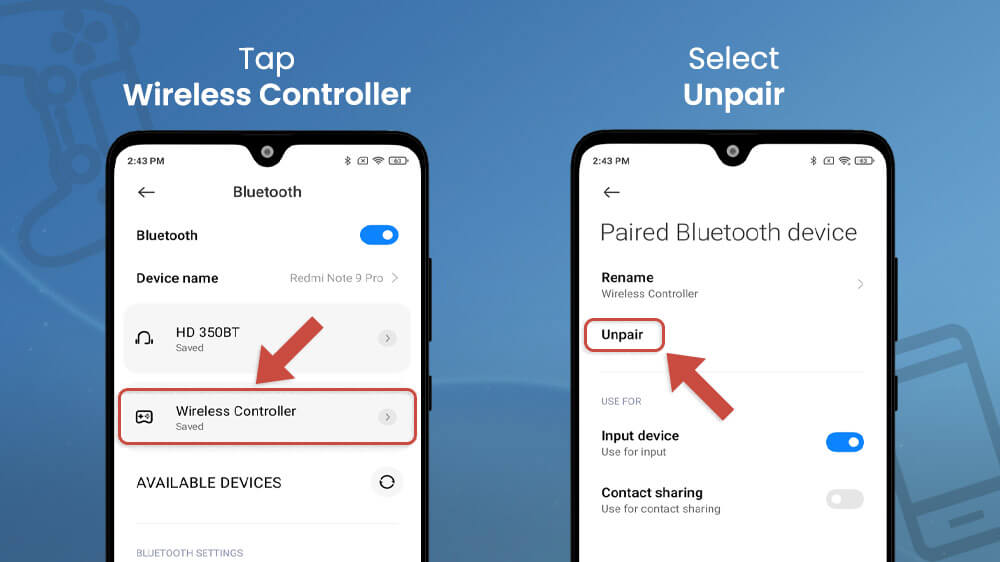
- Then, tap again on the Wireless Controller and select Unpair to eliminate the device from the list of Available Devices.
- The controller is now disconnected from your phone. To pair it with your console again, turn on the PS4 console and plug in the controller via your USB cable. Press the PS button to turn it on and that’s it.
The process lasts two minutes and is very easy to learn. Essentially, it is the same as pairing Bluetooth speakers or a headset to your Android device.
