We hope you are enjoying the Christmas season as much as we are here at Smartphone Tutorials. Today, we wanted to give you a special article about editing photos to give them that special Xmas theme. A lot of cool features like frames, templates, stickers, and more can be accessed from the free Christmas Photo Editor app. You can find it on your app store and it will allow you to make exciting Christmas photos. Let us see how it works.
Essentially, this free app allows anyone to edit their photos with holiday motifs, filters, and a whole bunch of other features. You can make superb Christmas family photos, your very own Christmas photo cards, or simply a personal holiday photo of you and your friends or loved ones. You can also edit videos to make Christmas Reels and video Stories, but today we will focus on photos.
It has a whole lot of different elements you can play around with. Each section also allows you to adjust the photo’s lighting, saturation, contrast, and so on at the end. The most popular editing tools are Photo Frames, Templates, and Blending. Each one can manipulate and enhance your photo in a different way so let us get to it and start creating. Let us begin.
How to Add Photo Frames
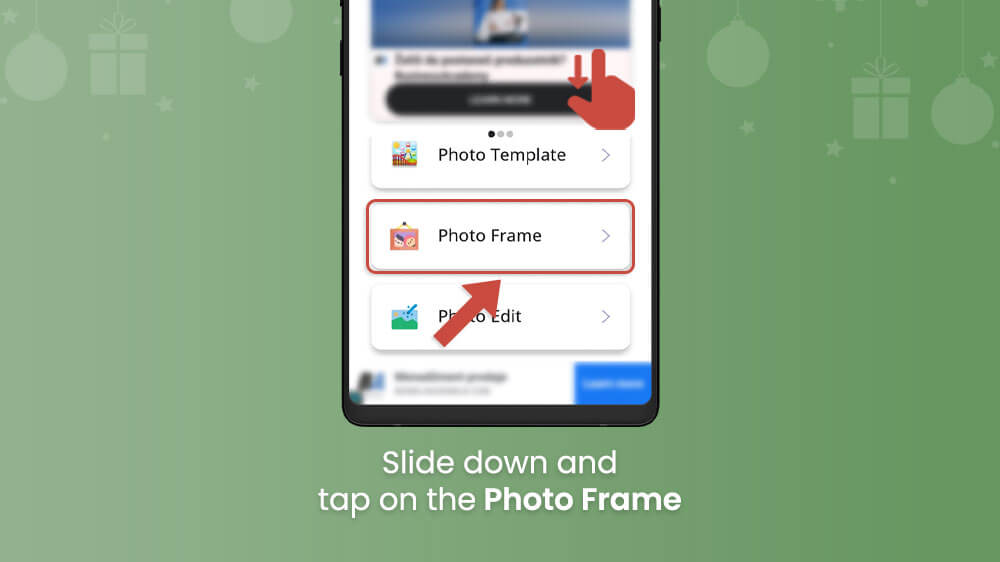
There are a lot of exciting features in the Christmas Photo Editor, so let us start with adding Photo Frames. You will be able to choose an aspect ratio for your photo, add a frame to it, and then make some photo edits if you wish. Let us take you through the fun and simple process of adding a frame.
To add a Christmas Frame to your photo, follow this guide:
Open your Christmas Photo Editor app, slide your screen to the bottom, and tap on the Photo Frame option.
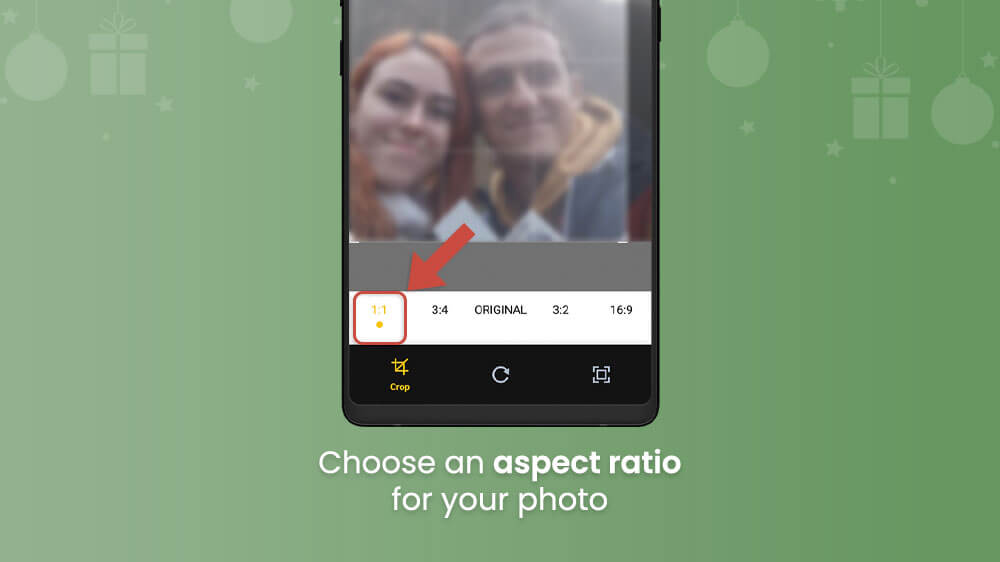
You will be prompted to open your gallery where you can select a photo you wish to edit.
Then, you can choose an aspect ratio for your photo (For example, the 1:1 for Instagram).
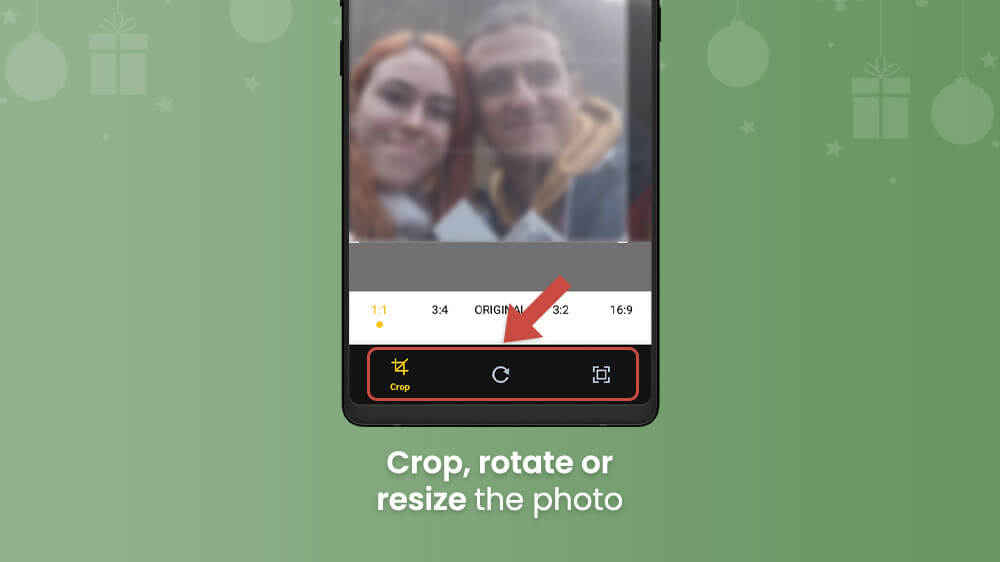
Here you can also crop the photo yourself with the left button, rotate with the middle one, and resize it with the right one.
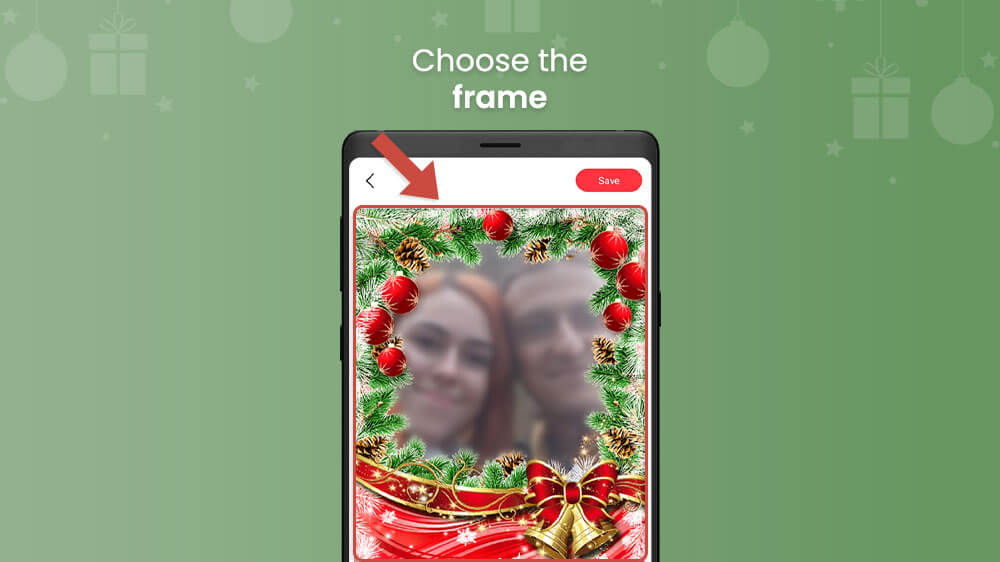
In the next menu, you can browse around and find a frame that you like best, select it to move on.
You can now use your fingers to move or resize your photo and fit it into the frame.
Once you are happy with the position of your photo, you can now edit it with the options below
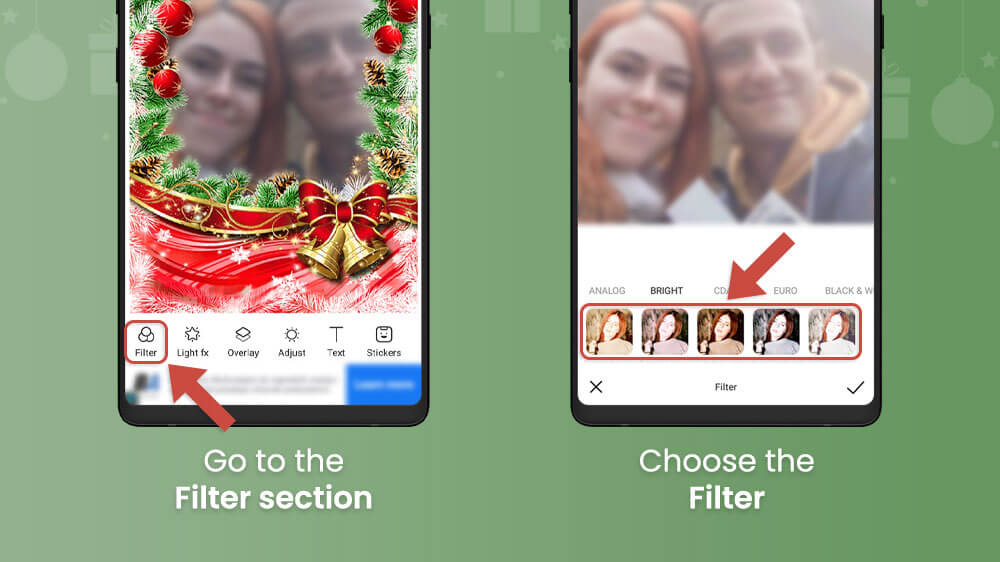
At the bottom left, you can browse and add filters.
You can browse and add an Overlay color combination while changing its features with the slider.
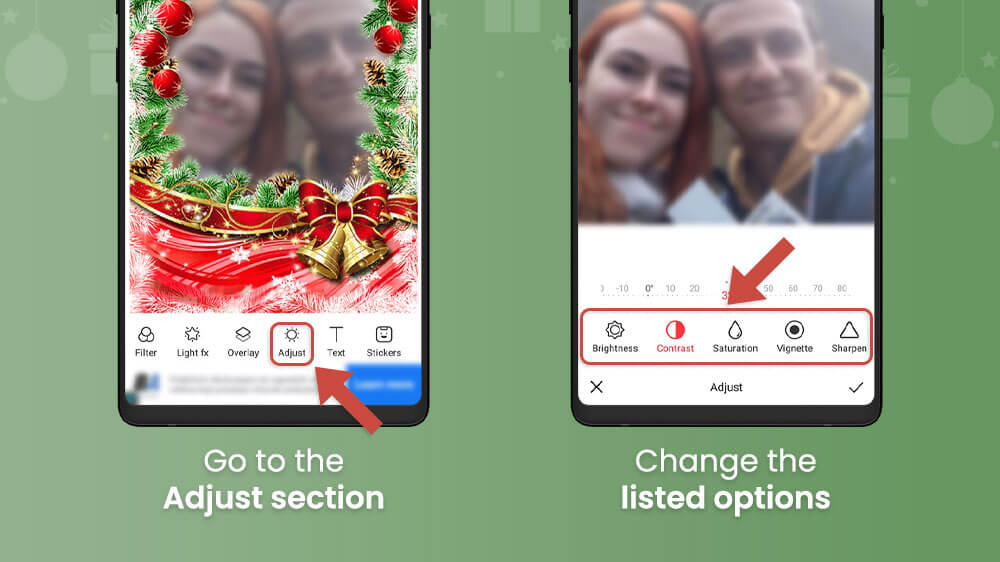
Tap on the Adjust button to change Brightness, Contrast, Saturation, Vignette, and Sharpening with the appropriate slider.
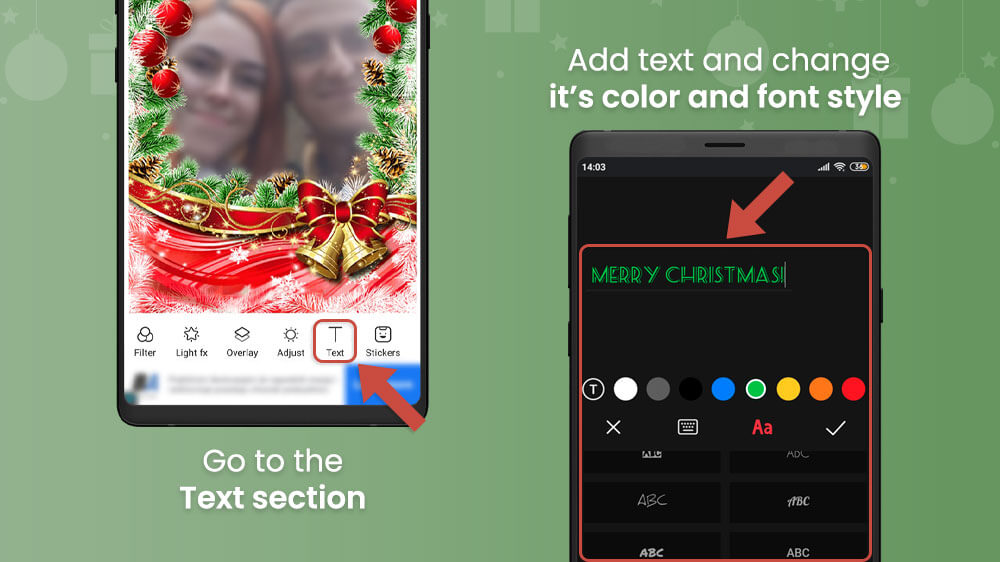
Select the Text option to add writing of interchangeable color and font.
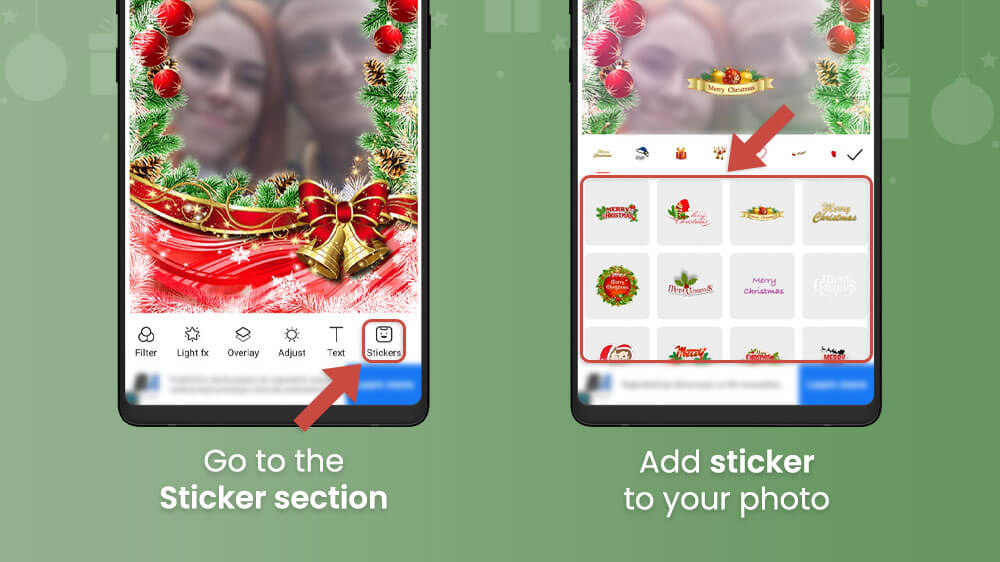
Finally, you can use the Sticker button to browse around and add stickers to your photo.
Tap on Save in the top right to finalize your photo.
Enjoy sharing your Christmas photo with friends and family.
How to Use Photo Templates
Templates are a similar feature to frames, but they instead change the background of your photo. This feature does this by removing the background of your chosen photo and replacing it with a Christmas-themed one of your choice. Here is how to use them.
From the app’s homepage, select the Photo Template option.
Choose a template from the available list.
Next up, from your gallery, choose a photo that roughly fits the body positions of the models on the template.
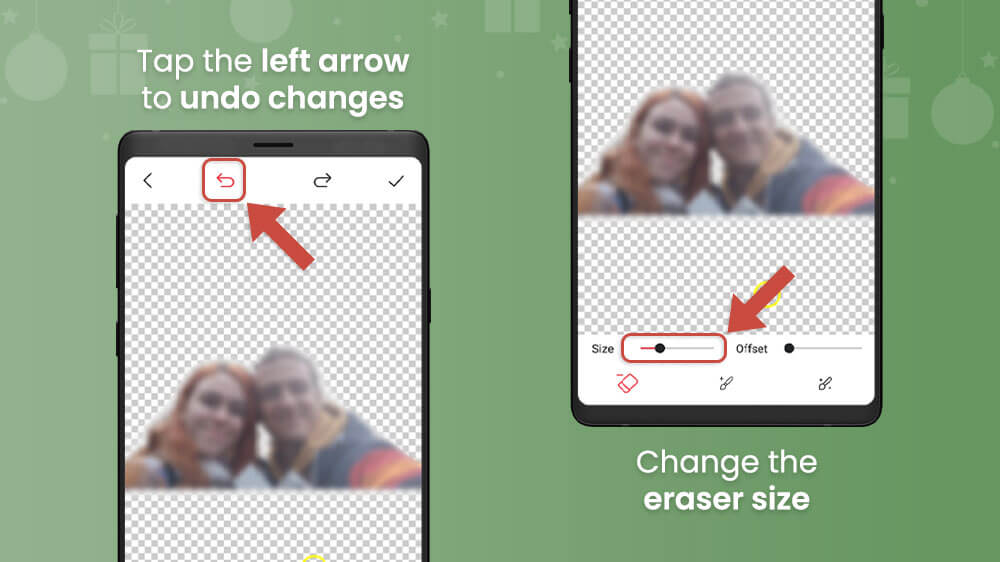
In the next menu, the background of your photo will be removed and you can erase anything else from the photo with your finger.
If you make a mistake the Undo button is on the top left while the Eraser size adjustment is on the bottom left.
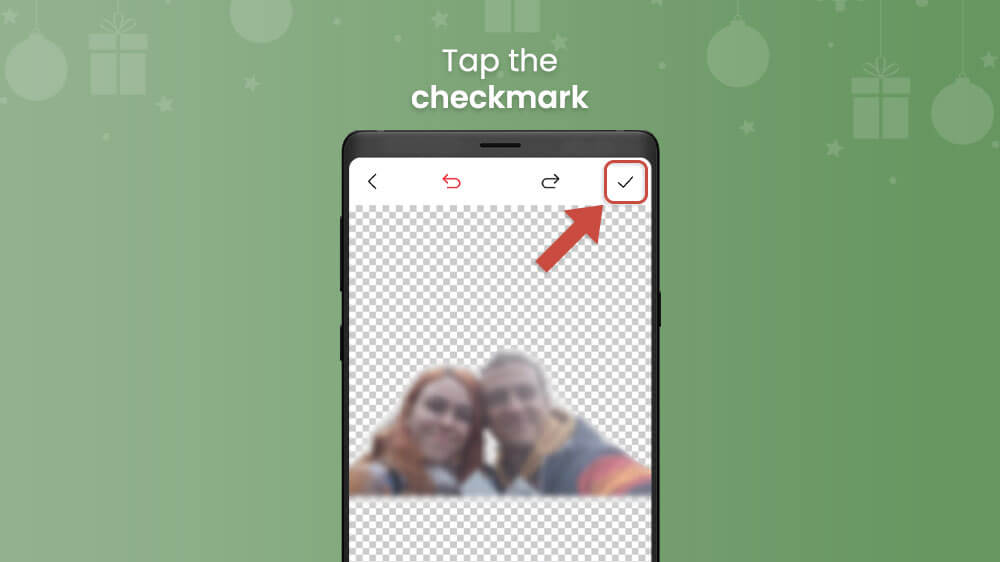
Once you are happy with your photo, tap the checkmark in the top right.
This will take you to the preview panel where you can see how your photo looks on the template. You can also make some edits here.
Move and resize your picture around the template with your fingers.
Pick a new template at the bottom
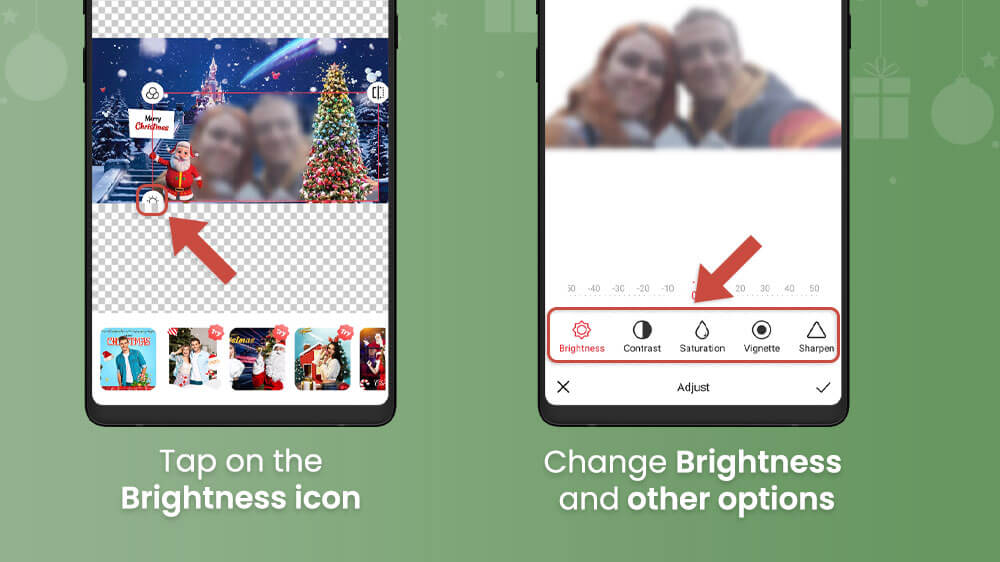
Adjust brightness and other options by tapping the button on the bottom left of the photo’s border.
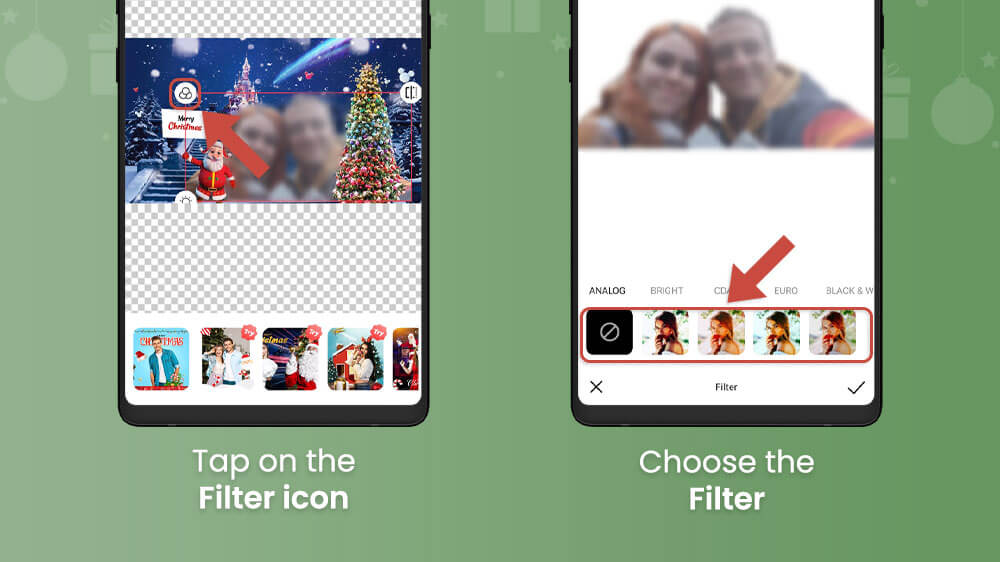
Add filters by selecting the button at the top left of the photo’s border.
Switch the alignment of your picture with the top right button.
Once you are happy with the photo, you can hit the save button at the top right to finish off.
How to Use Photo Blend
Photo blending is the last feature we are going to cover for images. It allows you to seemingly blend a Christmas-themed picture with one of your photos. The feature does this by automatically editing your photo to fit the theme of the picture. However, you can also make your own changes.
Here is how to use the Photo Blend in the Christmas Photo Editor:
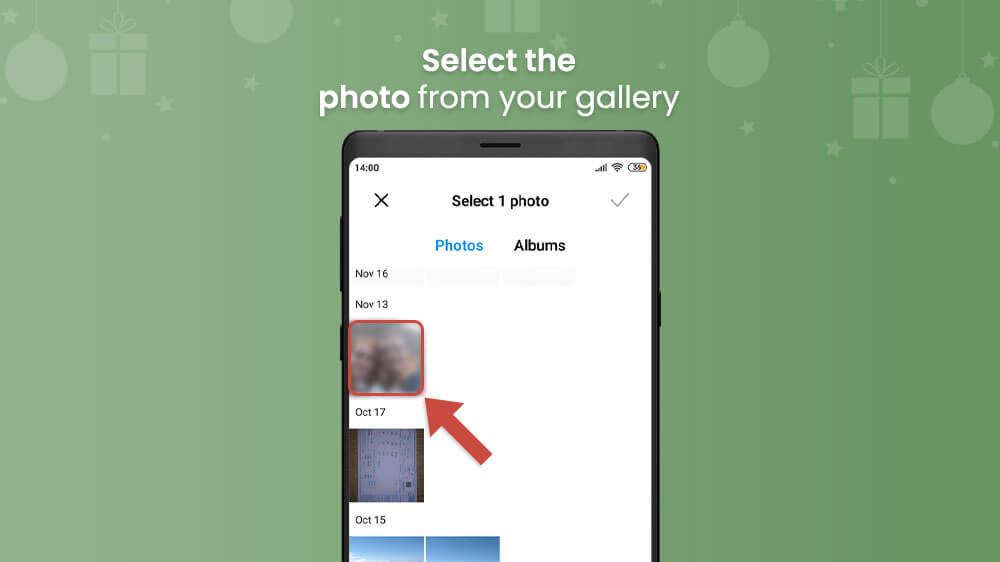
From the app homepage, select the Photo Blend option.
Choose a photo from your gallery to blend.
Next up, choose an aspect ratio, or rotate and resize your picture as necessary with your finger or the options below while tapping the top right checkmark to move on.
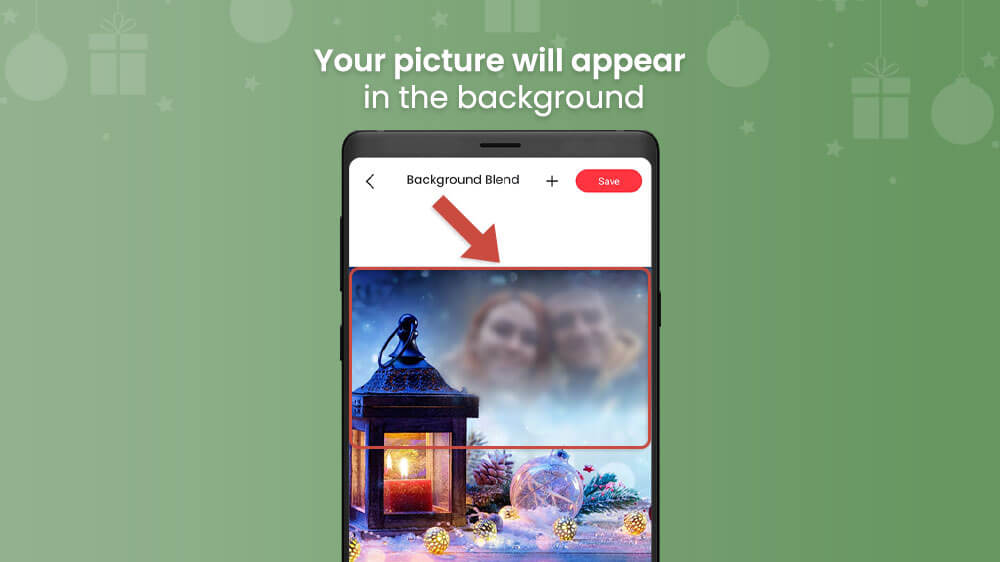
The editing section will appear with your picture adjusted to display faces with the background blurred.
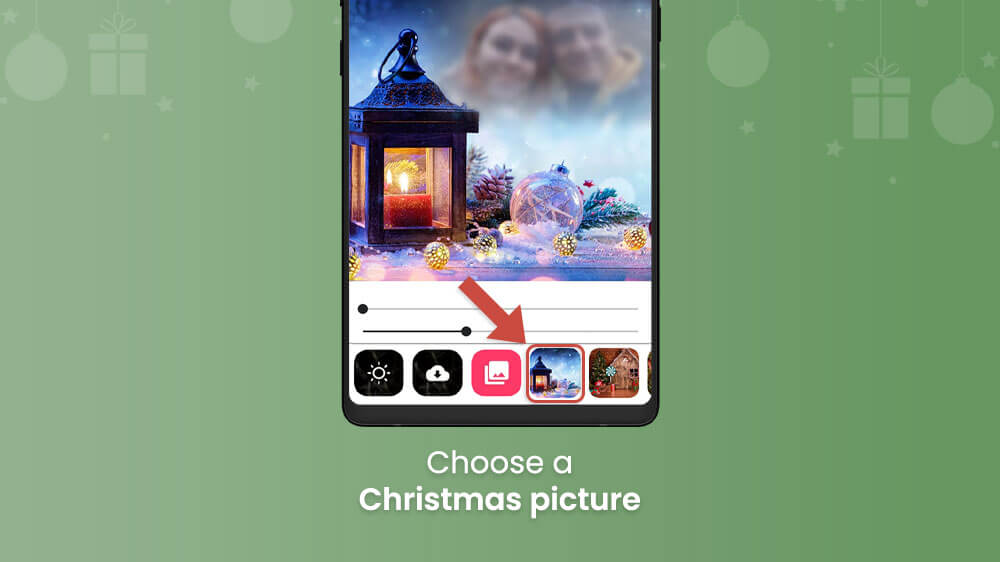
Now you can choose a Christmas picture at the bottom to become your new background.
Furthermore, you can adjust the transparency of your photo with the first slider at the bottom.
And you can adjust your photo’s background blur with the second slider.
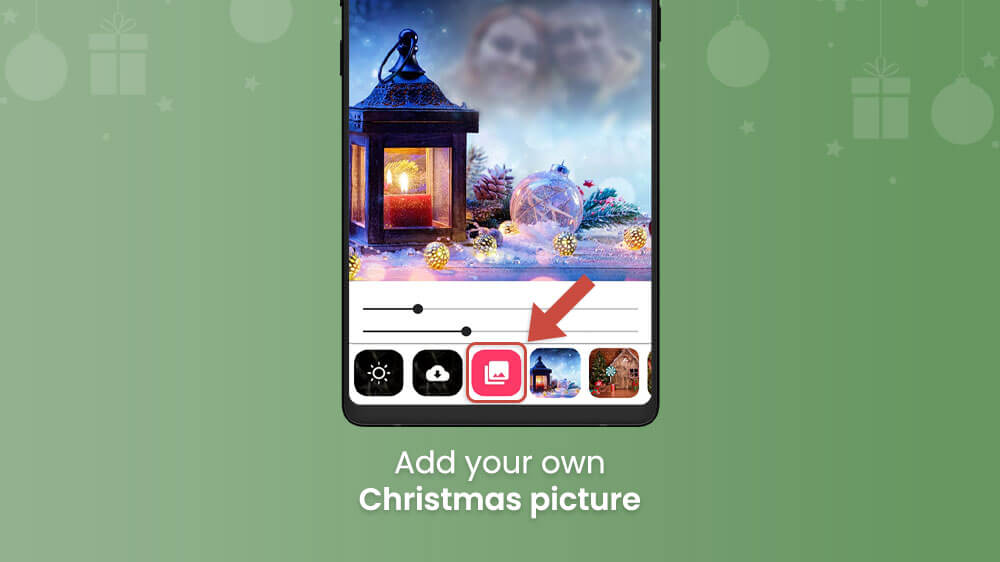
Finally, you can add your own Christmas picture as a background with a pink picture icon on the bottom.
Once you are finished creating your perfect Christmas photo, tap Save at the top right. You can now share all your edited pictures with your friends and family.
Honorable Mention – Christmas Photo Booth
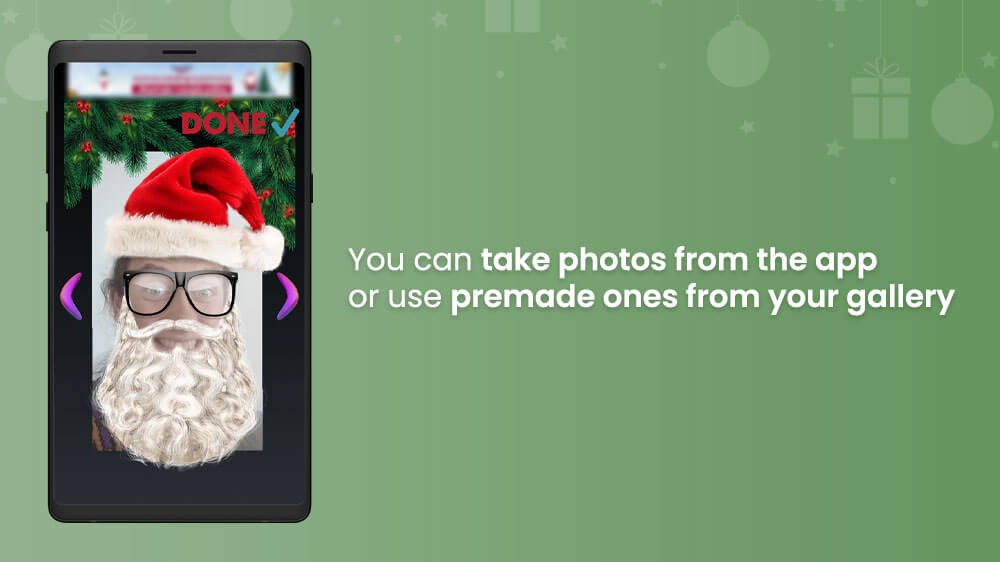
The Christmas Photo Booth app is another great app to give your photos an Xmas twist. It is a smaller app than the Christmas Photo Editor with fewer features, but it is also useful when you want to make a quick Christmas picture. You can take photos from the app or use premade ones from your gallery.
The main features are the various portrait frames with beautiful Christmassy designs. They are suited for a photo of just one person. Therefore, when you want to make a quick and exciting selfie for your friends, family, and loved ones hop in the Christmas Photo Booth.
Conclusion
We hope you find this article helpful for immersing you in the holiday spirit. The Christmas Photo Editor and the Christmas Photo Booth are both excellent applications for giving your photos that Xmas theme. For more Christmas goodies on your smartphone, check out our Top 5 Christmas Apps.