One of the newest exciting creative features you can make on your Instagram account are Reels. They offer users a chance to channel their ideas into a short video form that does not disappear like a Story. You might be wondering how to make a Reel on Instagram, in which case we shall take you through a step-by-step guide.
Creating Reels on Instagram is easily accomplished via the Instagram app so sign in and let us get started.
Table of Contents:
Instagram Reels are a new way to watch and create short and entertaining videos on Instagram. They are either one video or a series of shorter videos that can last up to 90 seconds. You can easily record them from the Instagram app or use an existing video from your gallery. Either way, you can then make a Reel, edit it, and add a bunch of special features to make it unique.
Reels are located in their own section on your Feed under the Reels tab, so you can easily distinguish them from your regular posts like Instagram photos. They are an extra way for you to interact with your audience or Close Friends and explore the Instagram community. Let us see how to make Reels on Instagram.
Since Reels are essentially short videos we will need to either record them or use prerecorded ones from the gallery. Everything is easily done through the Instagram app. Follow this simple guide:
- From the Instagram homepage, select the plus icon in the top right then select Reels in the bottom row.
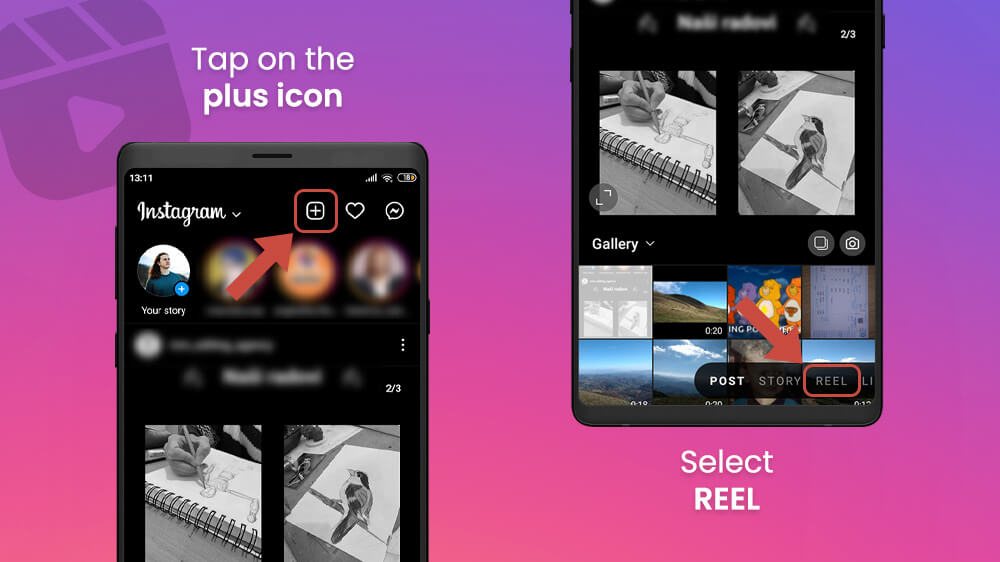
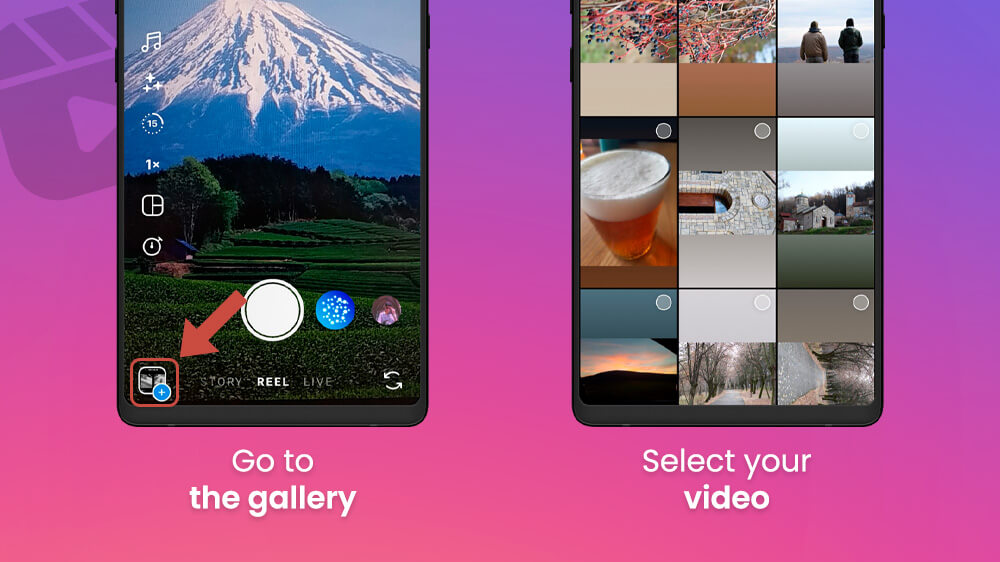
- In the Reels menu, you can either record a Reel by tapping or holding the white Record button or tap on your gallery at the bottom left and selecting your own video.
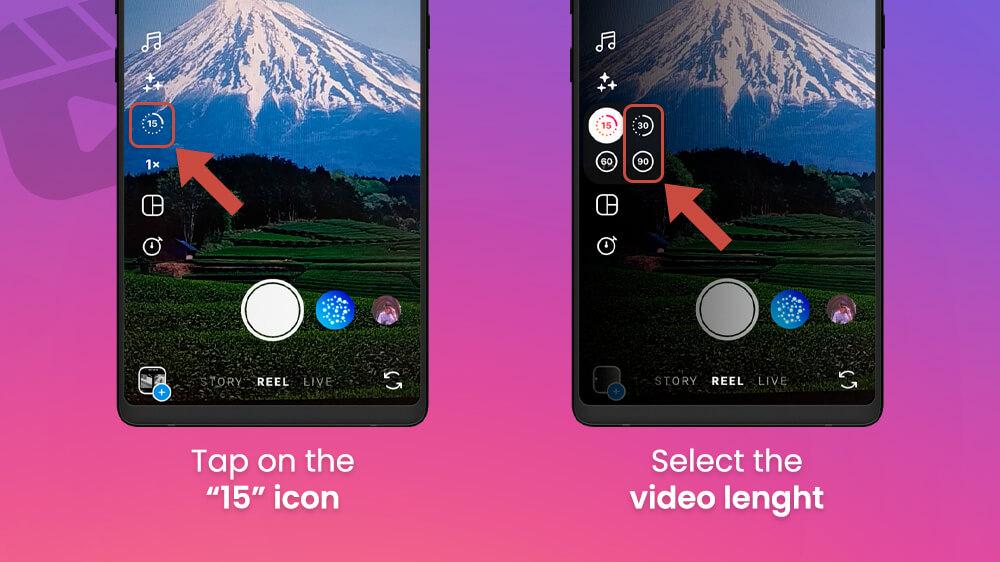
- You can set the length of a single recorded video or each individual clip with the Recording Time icon on the left from 15 to 90 seconds.
- Also, you may add a filter or special effect to your recordings by sliding the Recording button to the right and selecting one.

- After you have recorded your Reel or chosen a clip from your gallery, tap Next on the bottom right.
Next, you can add extra features, some that you can move around and resize with your finger. We will cover some later in detail but here are some basic ones now.
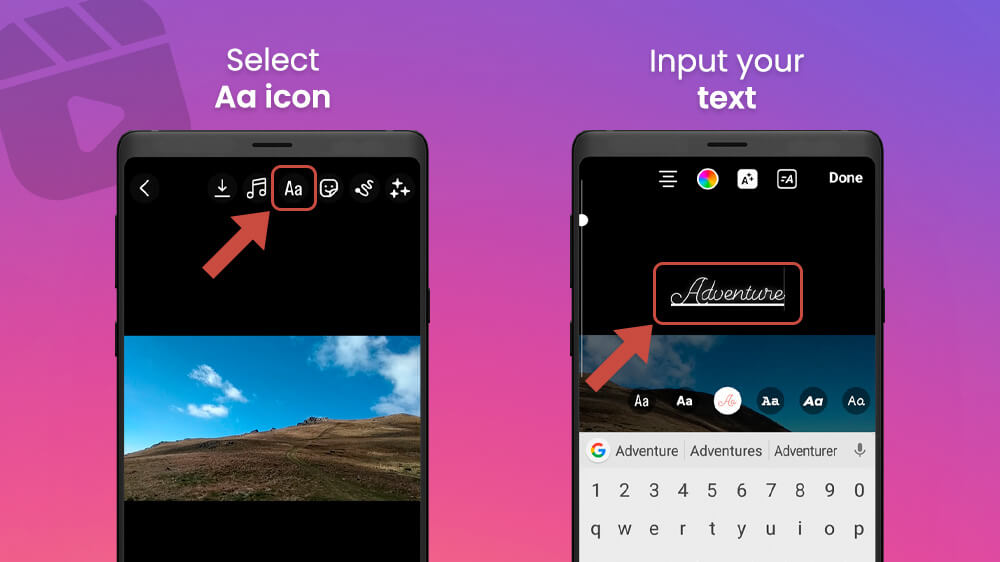
- Add text to your Reel by selecting the Aa button, inputting your text, and pressing Done.
- Add various widgets, clip art, and gifs by pressing the Sticker button on the top right and selecting your desired feature.
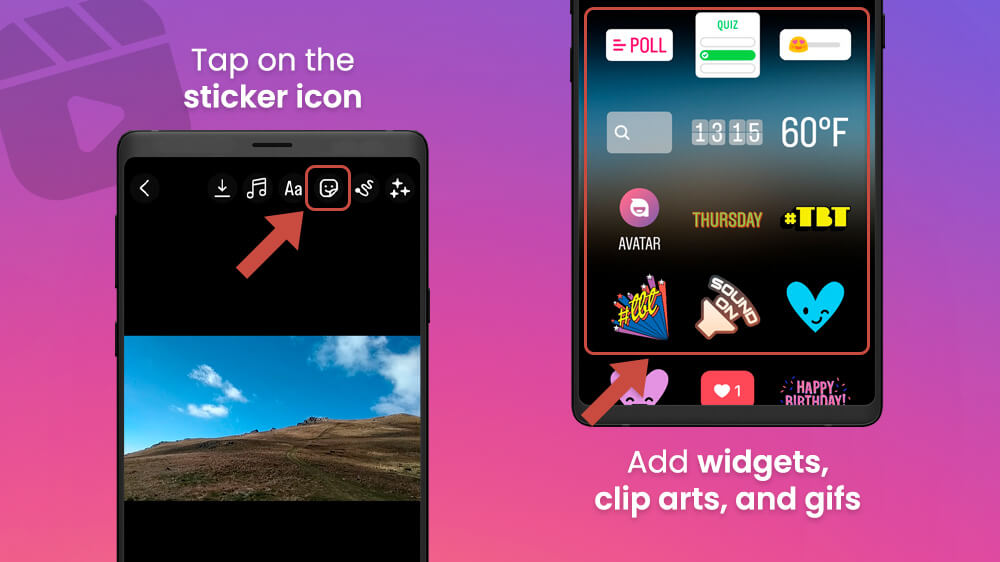
- You can slide the screen left and right for filters and once you are happy with your Reel, tap Next in the bottom right to proceed.

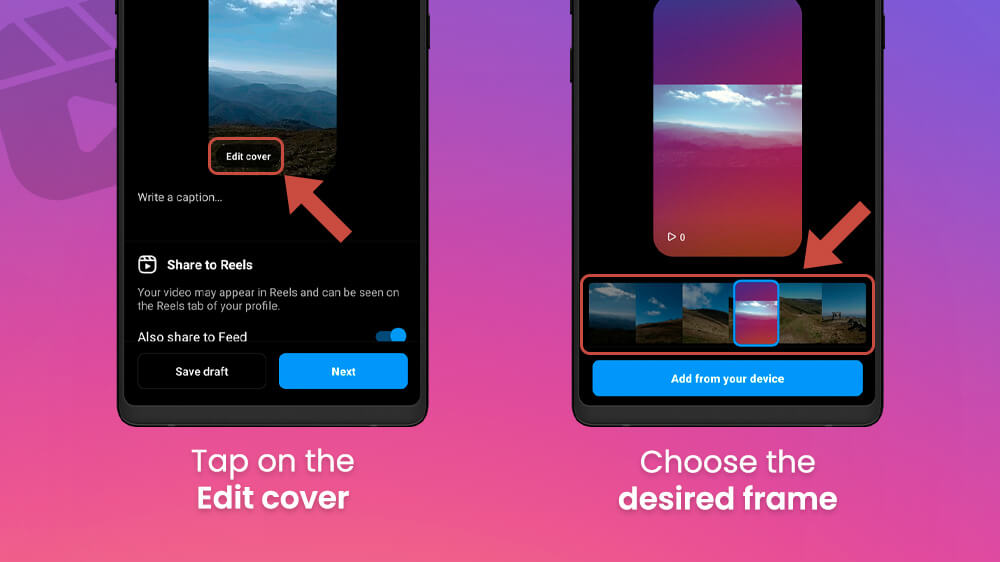
- In the following menu, you can change the cover of your Reel by selecting Edit Cover, picking the desired frame, and tapping Done in the top right.
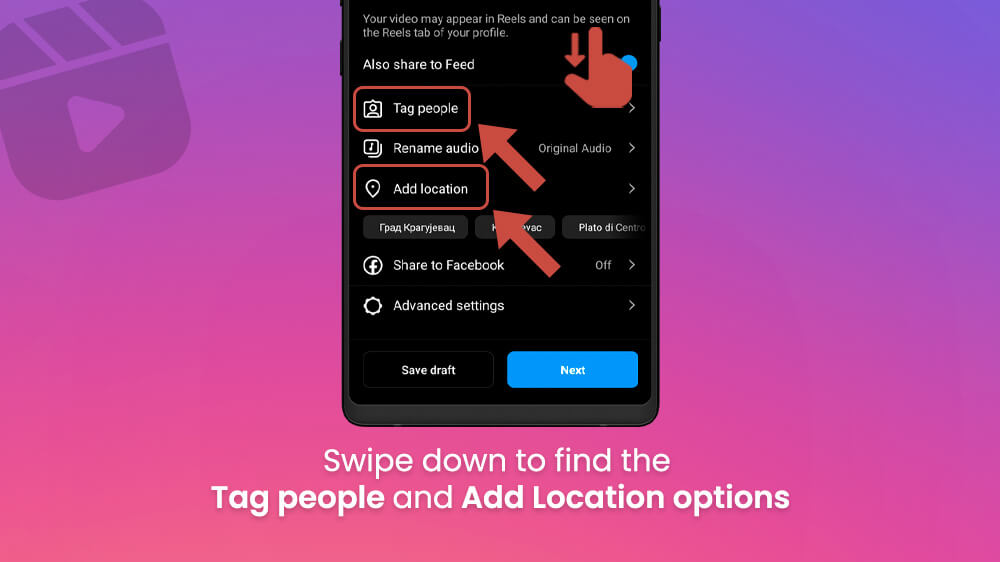
- Additionally, slide your screen to the bottom to access various options like Location or Tagging.
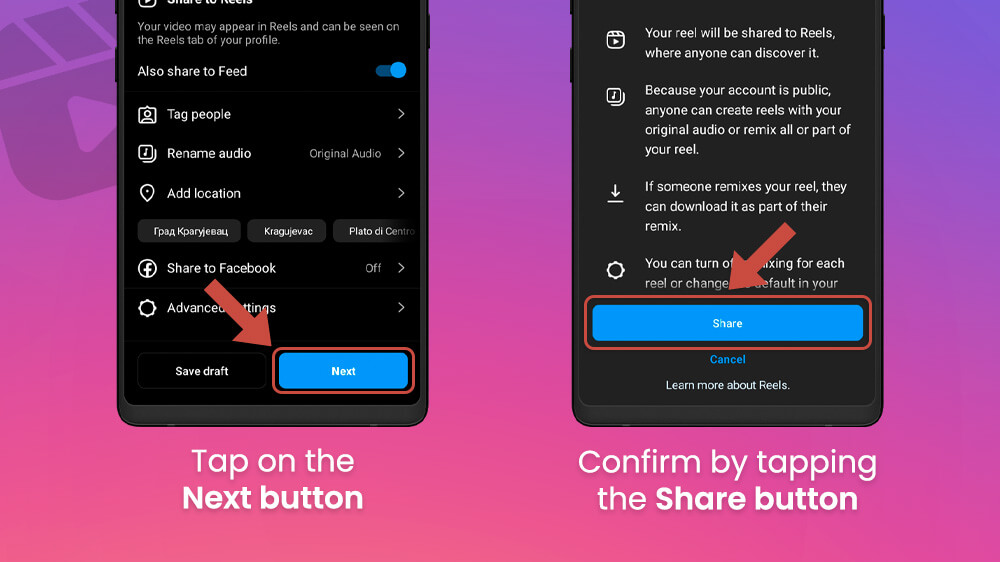
- Finally, tap the Next button then Share to publish your Reel.
You can add music to your Reels from Instagram’s public library. This can be done either from the recording section or from the editing section. Let us cover both ways.
- From the recording menu, you can select the music icon on the left.
- Pick a song from the recommended list or use the search bar to find the one you want.
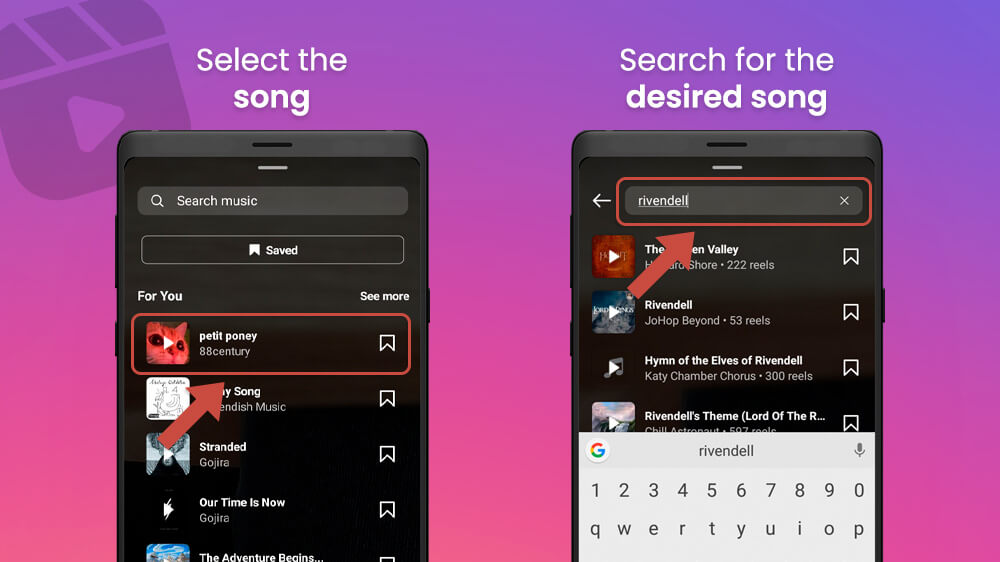
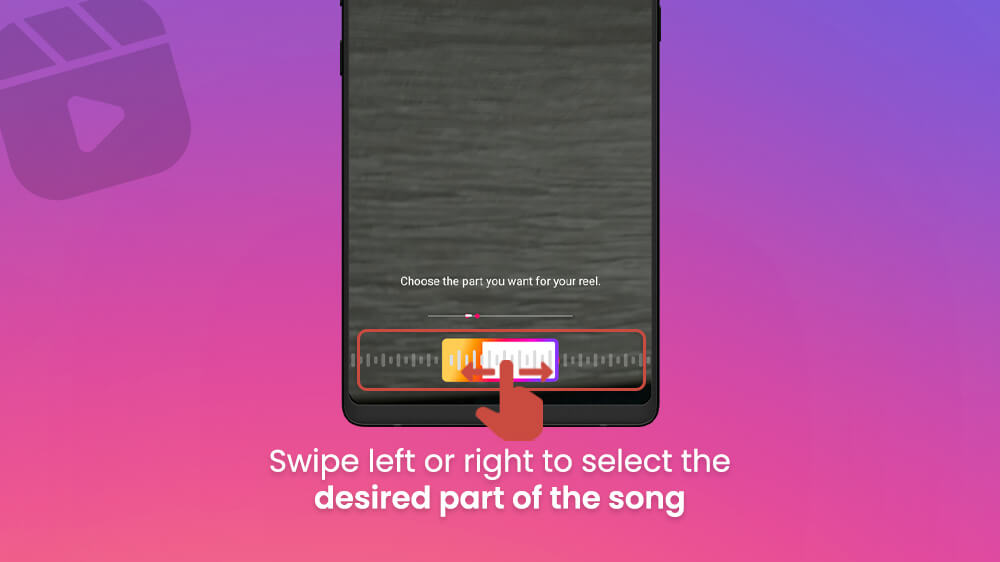
- Once you select a song you can choose which part of it you want to use at the bottom by sliding the active song bar left and right.
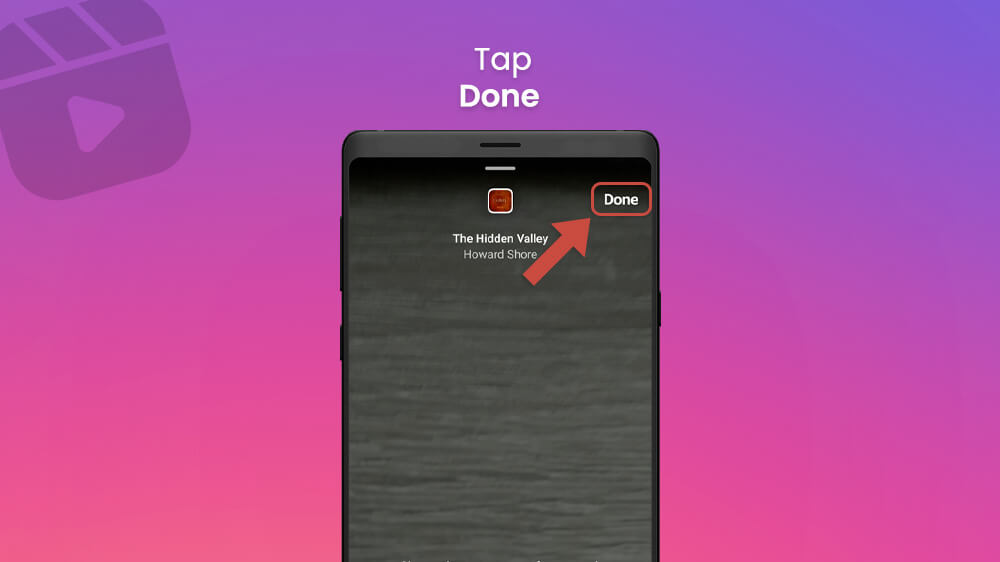
- Finally, once you are finished tap Done in the top right.
Alternatively, you can also add music from the editing tab in the following section. Simply select the same music icon, this time at the top of your screen.
Follow the same above process for picking a song you like.
You can edit Instagram Reels by adjusting your various clips and during your creation process if you have more than one. This is also where you can add transitions. Let us cover editing Instagram Reels.
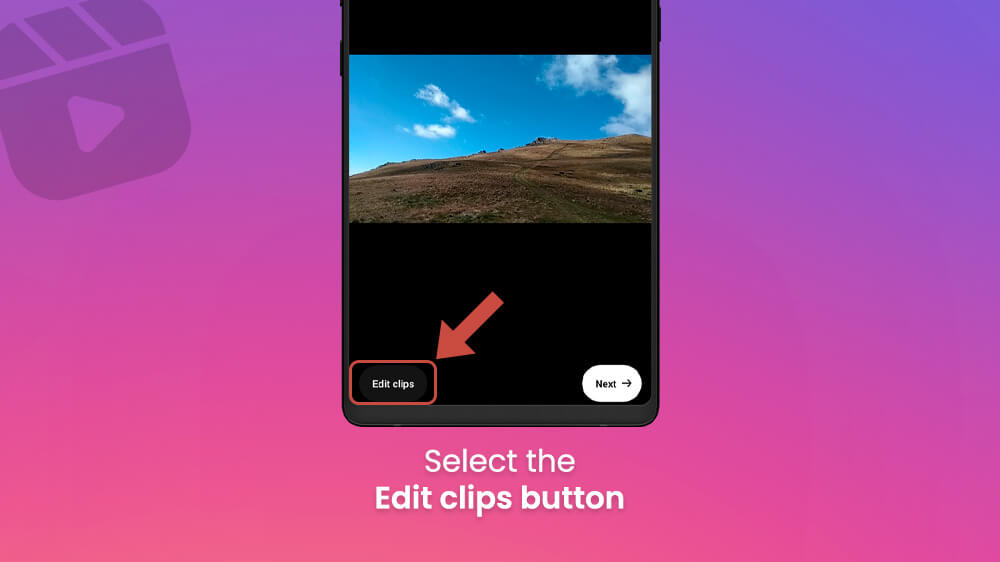
- From the editing section, select the Edit Clips option in the bottom left.
- You can add or record another clip by tapping the plus icon.

- If you have several clips you can change their order by selecting Reorder and then dragging them to your desired position.
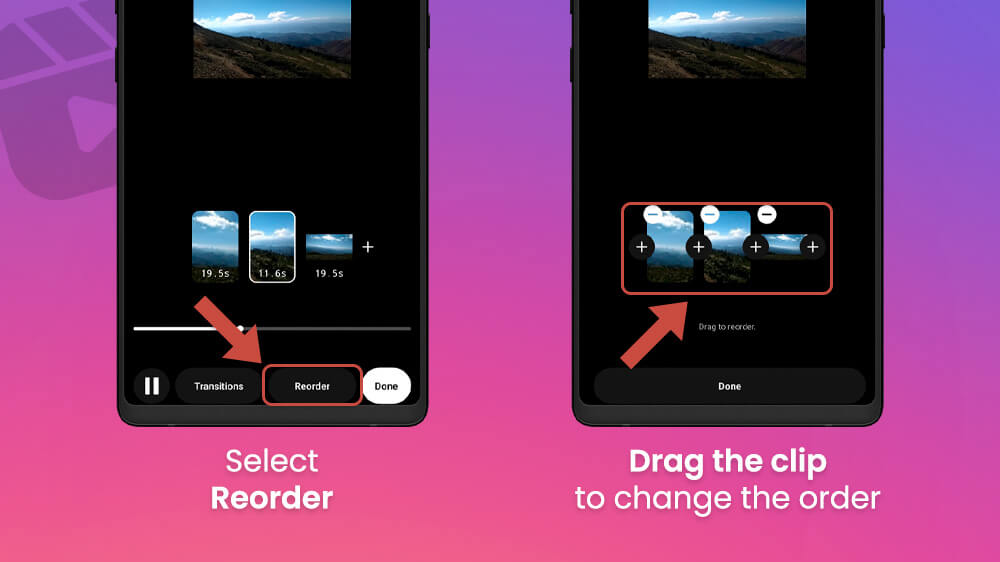
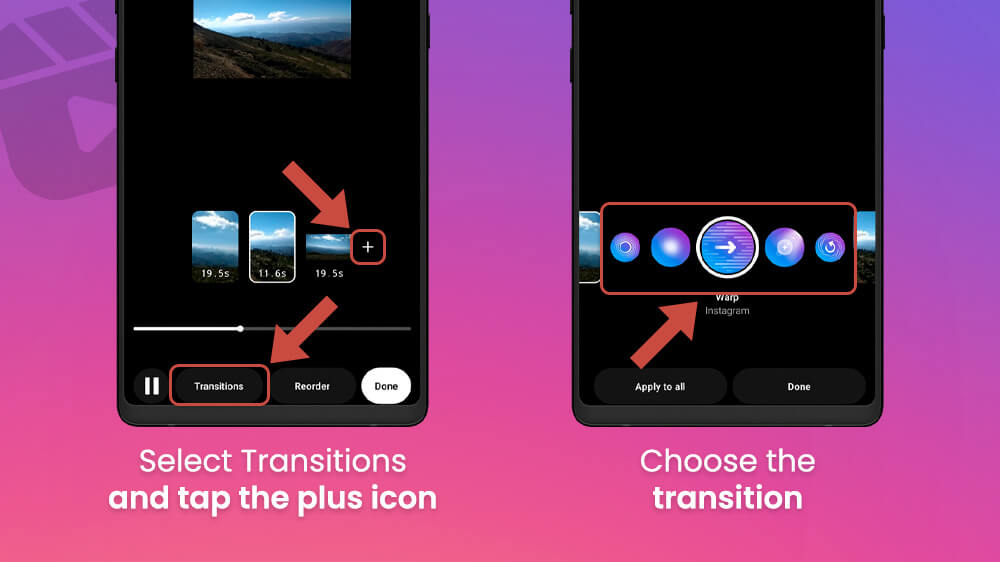
- Finally, select the Transition option and then tap the plus icon to add various different transitions between your clips.
- Once you are finished editing hit Done in the bottom right to finish things up.
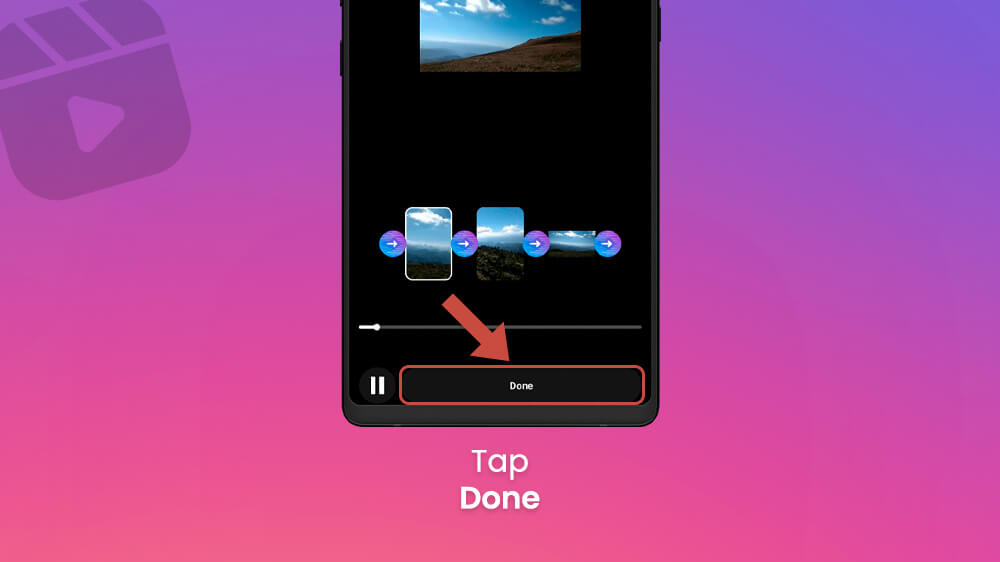
The Edit Clips section is a great way to introduce structure and special effects if you have multiple clips in your Reel.
You can alter the speed at which you record your Reels. Here is how.
- Before shooting a video in the recording section, tap on the 1x button on the left.
- Here you can choose how slow or how fast you want to record your video.
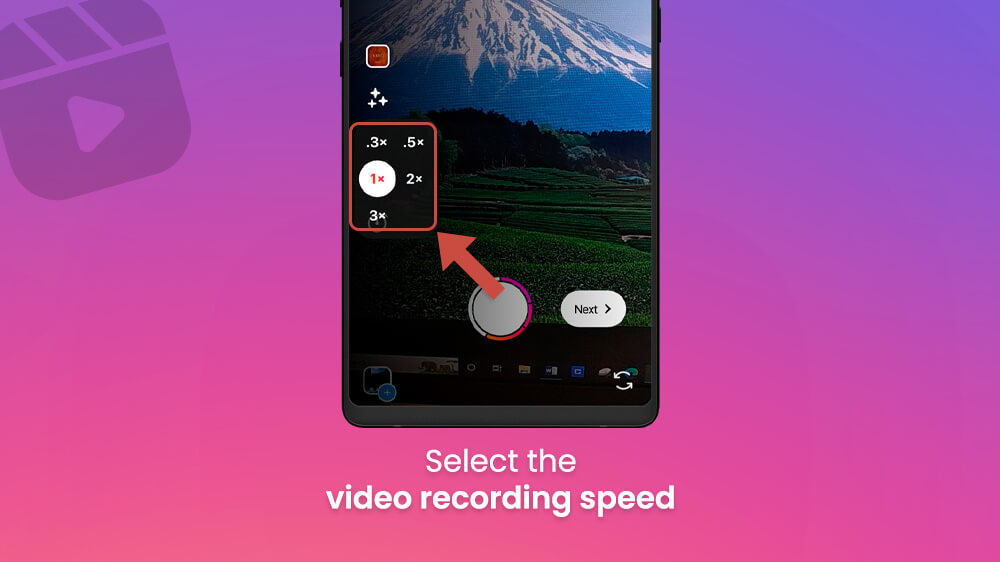
- Once you pick a speed, simply hit the white Record button and your video will match the speed you selected.
If you need a different layout for your recorded or uploaded videos, you can do so with the Layout option.
- Before recording your Reel, select the Layout icon on the left.
- A new alternate layout icon will appear below the original one that you can tap for more layout options.
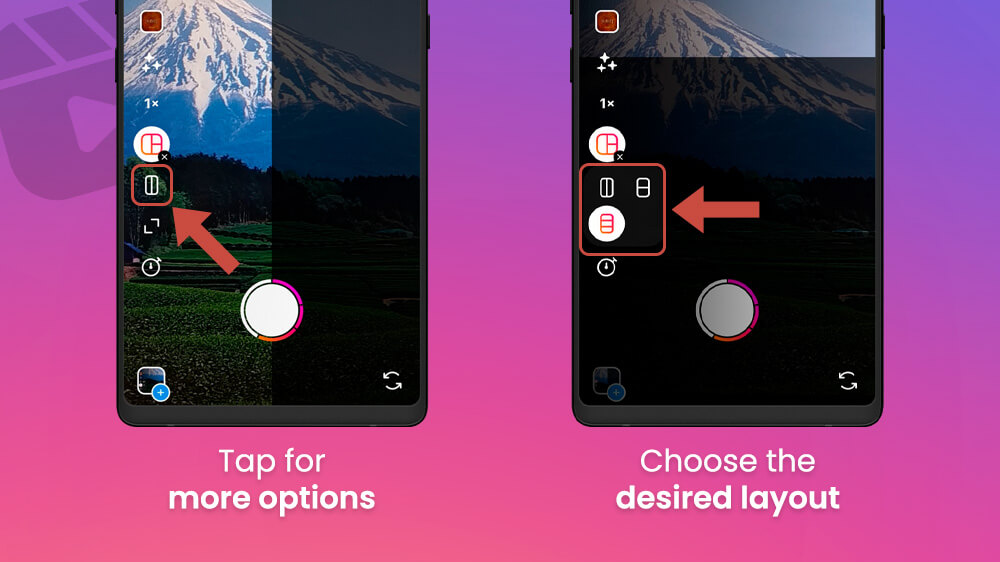
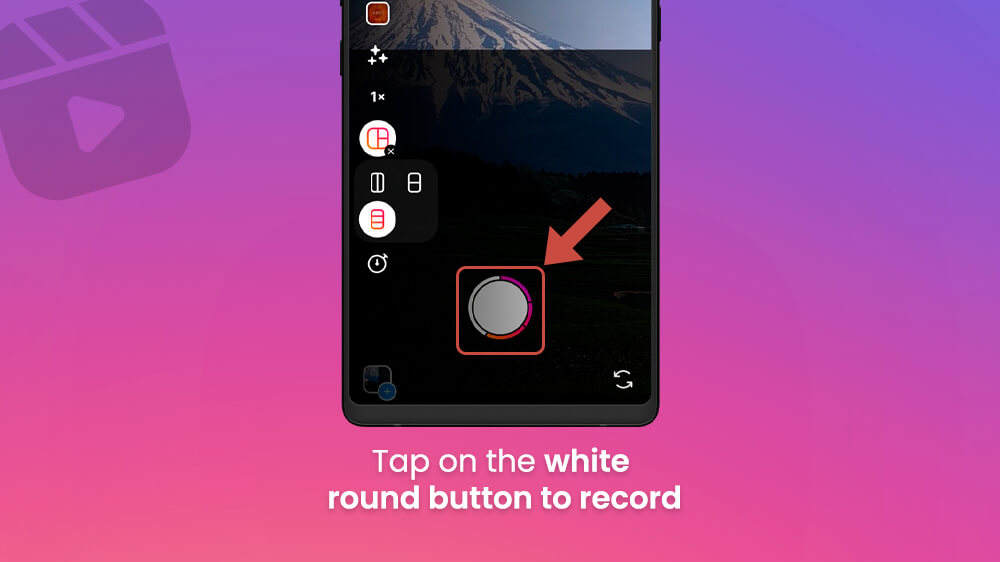
- You then need to record or upload a separate clip for each section of the layout by tapping the white Record.
- Also, you can tap the arrow-looking Invert icon to change the position of your clips in a layout.
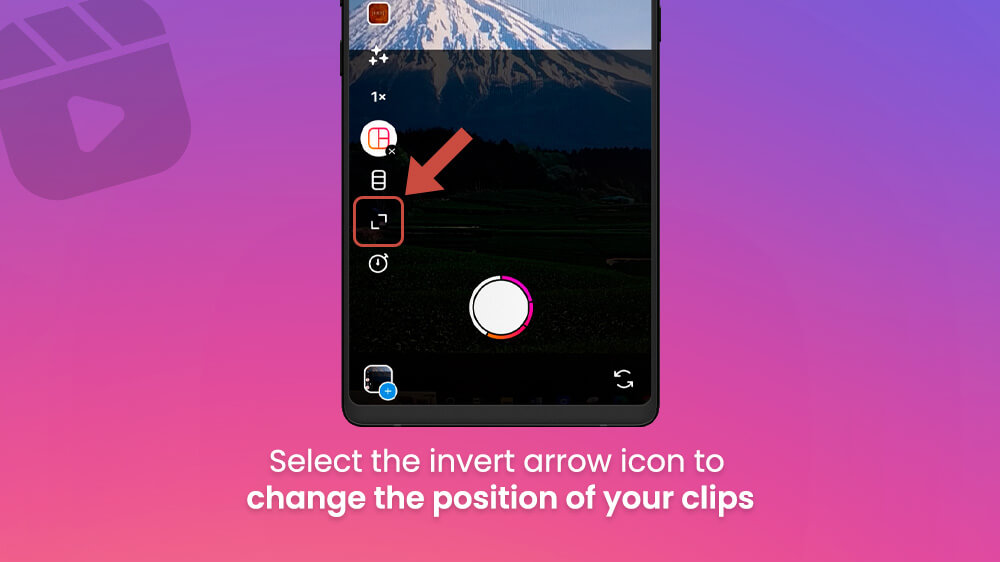
This option is great for making a dynamic multi-layered Reel.
If you want your hands free while recording an Instagram Reel, you can use the Timer option. It is located in the recording section on the left-hand side of your screen and looks like a little clock.
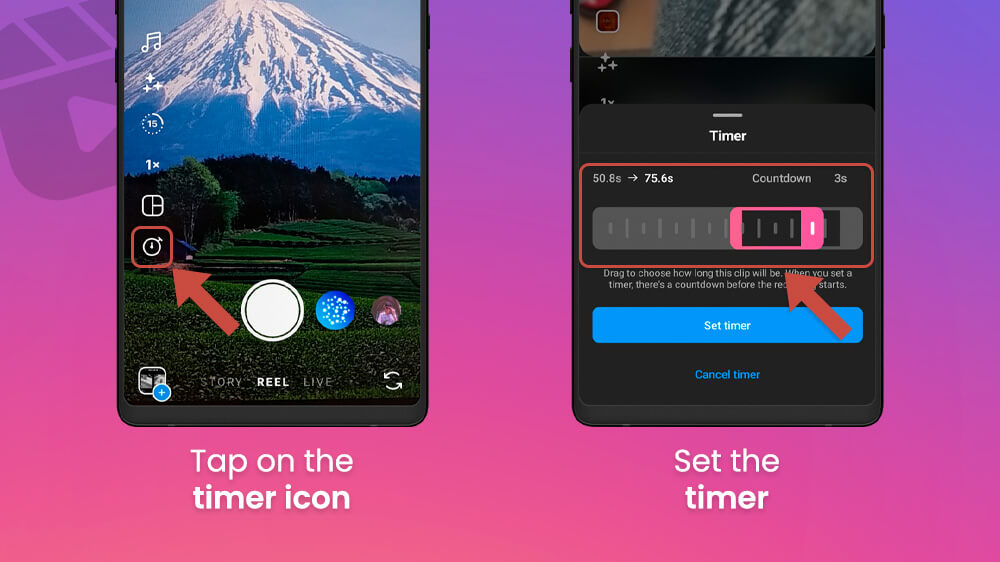
It allows you to select how long you want your clip to be and then you can hit the record button and have a 3-second countdown before your camera starts recording. Your camera will keep rolling until it hits the time limit you set previously. Perfect for getting into position for your Reels.
This option goes hand in hand with the drawing feature. You can either draw on your Reels or change your background completely. This option is available from the editing section so let us see how we can use it.
- From the editing section tap on the Pencil icon in the top right.
- Here, you can use the various brushes at the top and colors on the bottom to draw different shapes on your Reel with your finger.
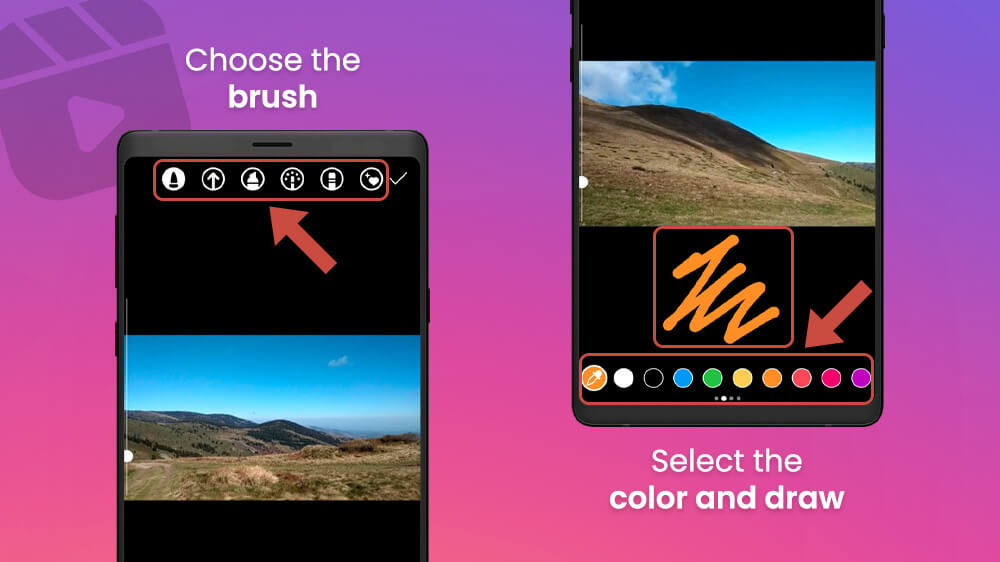
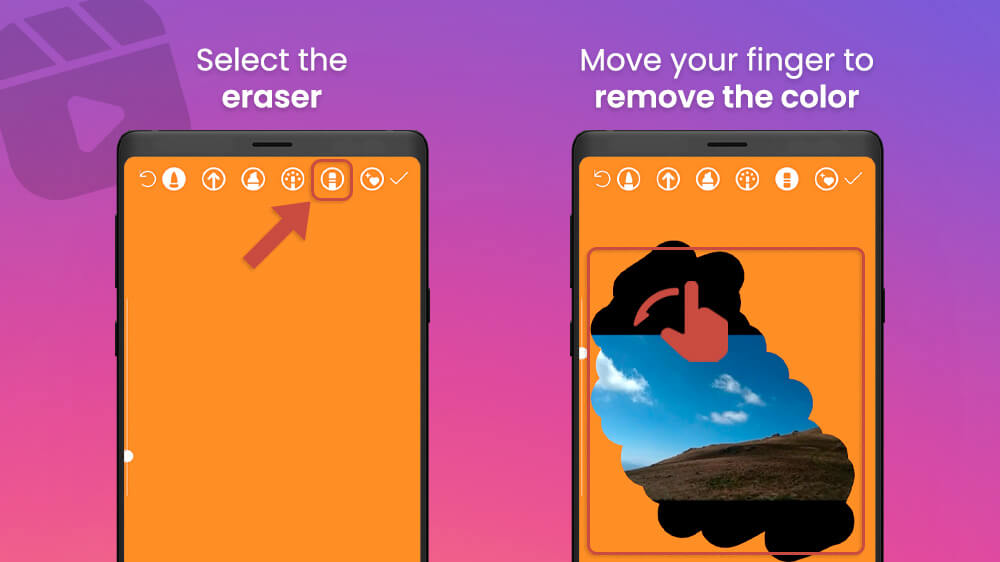
- To change the background color simply select any brush and your desired color then hold your finger on the screen for a few seconds and let go.

- This will change the entire screen to your chosen color and then you can use the eraser at the top right to map out the part of the screen that you want to show.
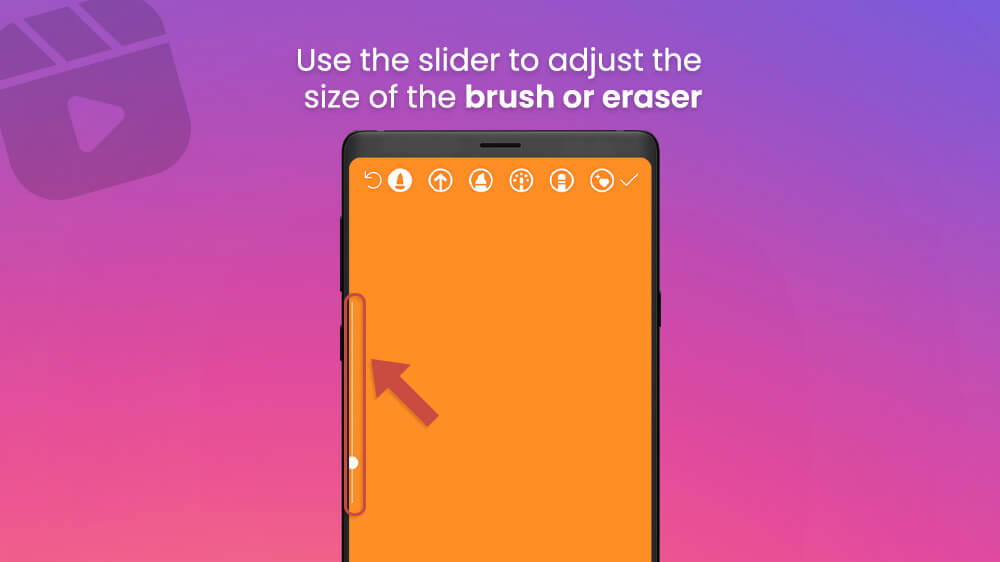
- For any brush or eraser, you can increase or decrease the size by using the slider on the left with your finger.
There are tons of creative possibilities you can use the Drawing option for so go wild and experiment.
The Reel feature of Instagram is another exciting way to engage with your audience. Its creator studio offers content makers a chance to express their creativity with various special features. There are simply some elements that cannot be expressed with a photo, and video Stories disappear after a certain time. Therefore, Reels are the perfect dynamic content that will entertain your audience for weeks, it just requires a bit more work.
That being said, we hope we have helped you with making quality Reels, and stay tuned for our other Instagram guides.
Instagram Reels can usually be anywhere from 15 seconds to 90 seconds maximum.
You can download Reels by opening your desired Reel, tapping the three dots icon on the right, and selecting the Save to Phone option.
The answer can differ based on the demographic you are trying to target but the best time to post Instagram content is usually in the morning hours.
You cannot see who viewed your Instagram reels as of yet. That being said, this feature may get introduced in later updates.
