A crucial part of any Instagram profile is a great visual representation of your content. There is a big difference in quality between photos someone posts right from their camera and photos someone has worked on. Editing your photos plays a huge role in the quality of your content, no matter what genre, category, or business you post for. If you are wondering how to edit Instagram photos, we have just the guide for you.
Instagram has made the editing process quite accessible, easy, and even fun. Everything is streamlined in the posting process and you can adjust various values to give your photos a unique look. In addition to giving your photos a glow-up, editing can also help you create a specific style for yourself that people will flock to. Let us go through the editing process together.
As we mentioned, editing photos on Instagram is quite easy and you do not need to download any third-party apps for it. Instagram has plenty of tools you need for editing in-built into the posting process. That should not stop you from trying third-party editing apps if you are interested. But for beginners, the Instagram app is all you need.
Editing takes place right after you upload a photo for posting. There are numerous features you can play around with from brightness to colors to adjusting the frame. The general rule is to always start with a high-resolution photo for the best quality and final product. Let us take you through a step-by-step process of editing a photo.
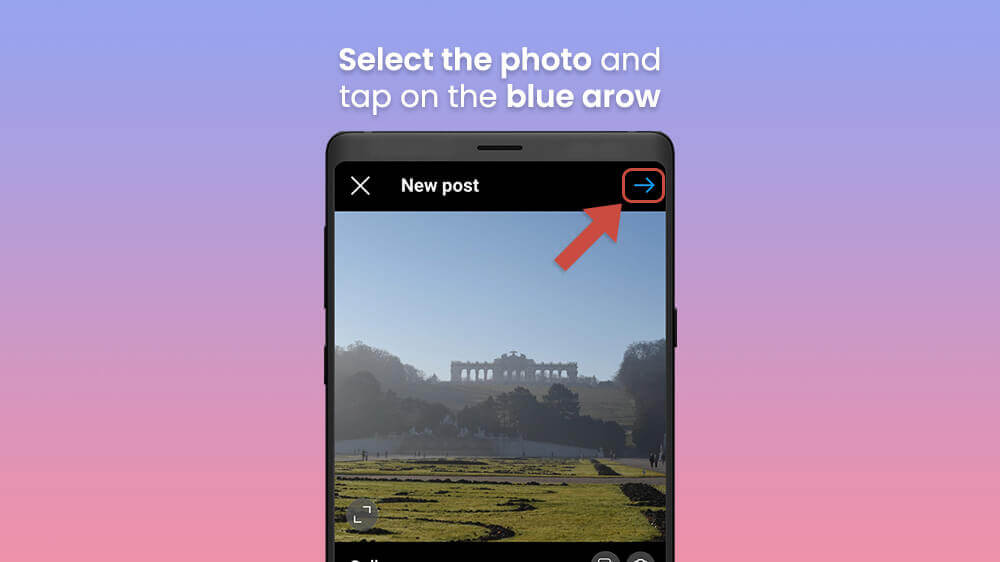
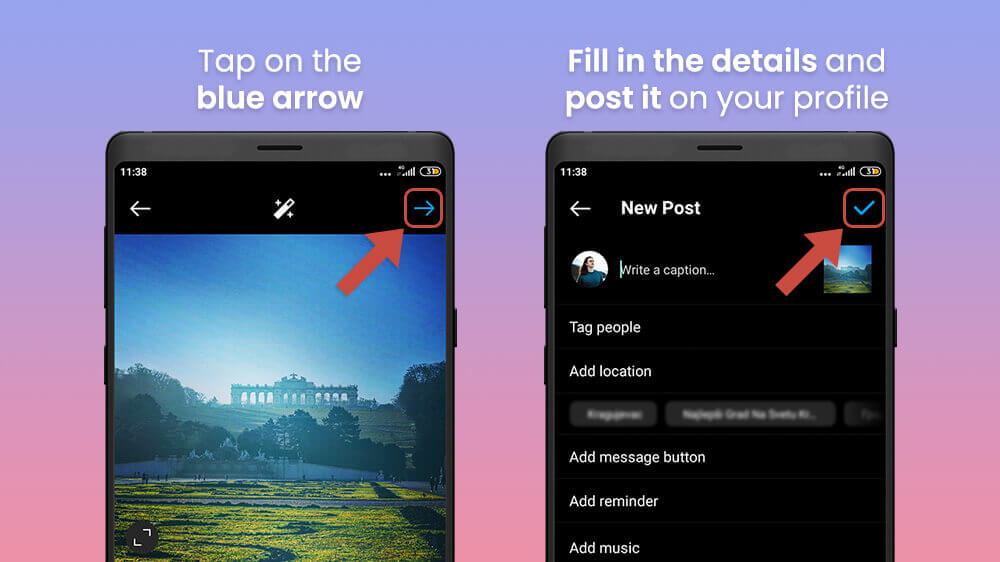
To begin with, open the posting menu and select a photo you wish to edit then tap on the blue arrow in the top right.
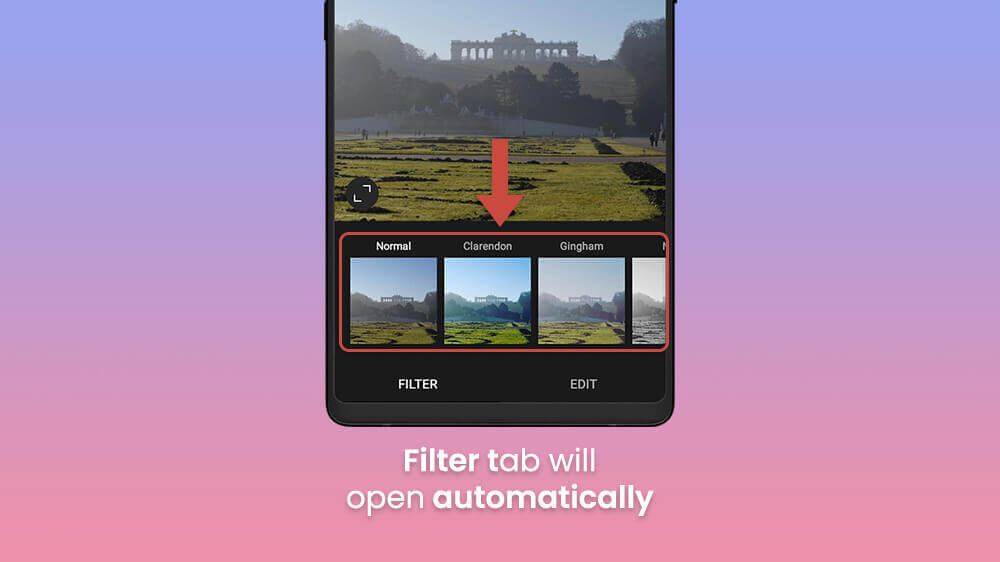
Instagram will automatically then open the editing tab starting with Filters.
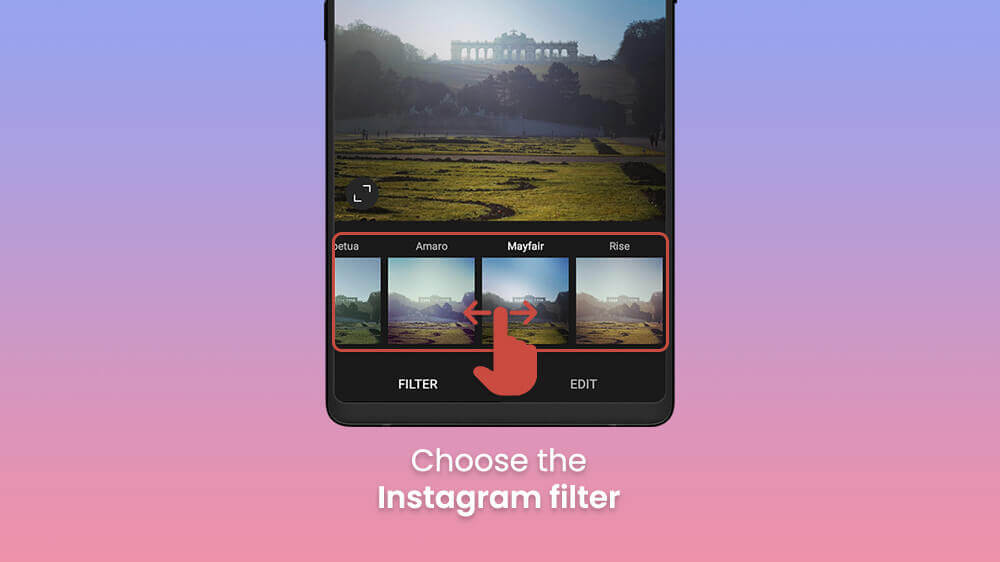
Slide through them with your finger and choose the one that suits your photo best.
At any time, you can also tap on the little pencil icon at the top to adjust lux (Lightens shadows, darkens highlights, and increases contrast).
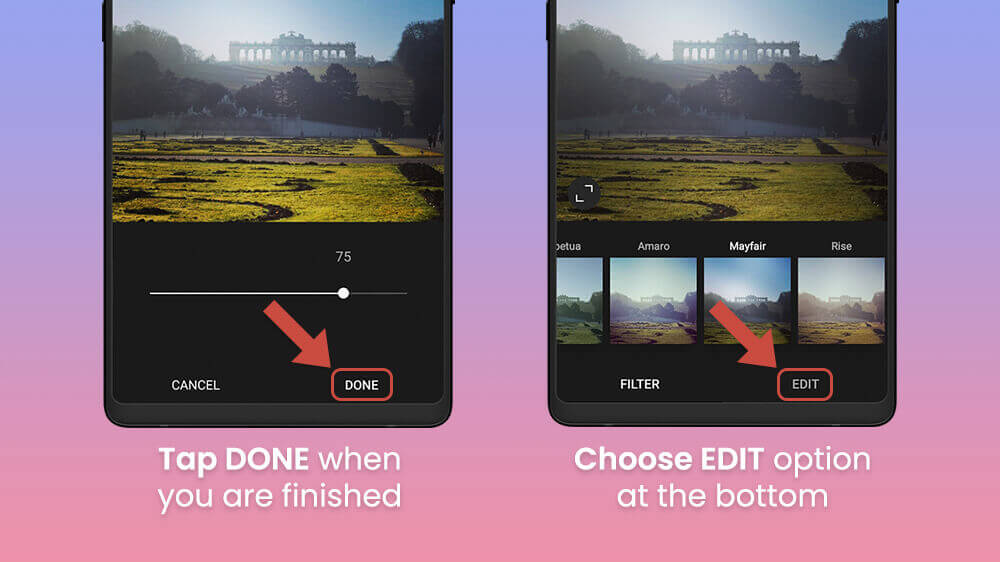
Once you are happy with these starting factors, tap Done and then tap on Edit in the bottom right.
You will now be taken to the editing section where you can adjust various sliders for various customization options.
How to Edit Instagram Photos
Once you are in the editing section, you will have access to numerous options for creativity and making your photos unique. This is quite a fun process that does not take a lot of time. Any option you choose usually has a slider associated with it you can alter and then hit done once you are finished. You can always skip the options that do not interest you. That said, let us take you through each one:
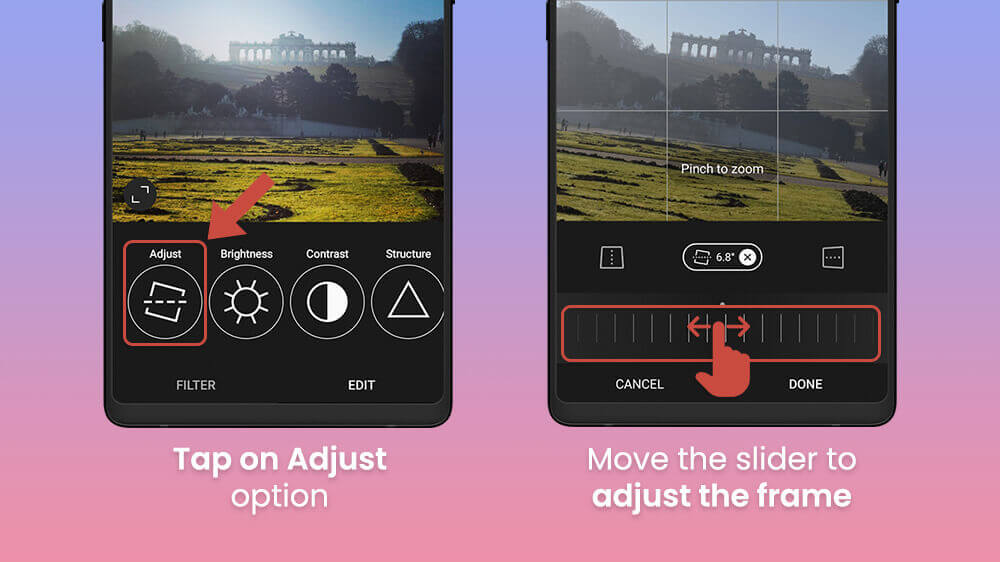
The first option is the Adjust button where you can alter the frame of your photo by moving the slider at the bottom with your finger.
Then there is the Brightness button for adjusting how dark or bright your photois with the slider.
Up next is the Contrast option for adjusting this element of your photo.
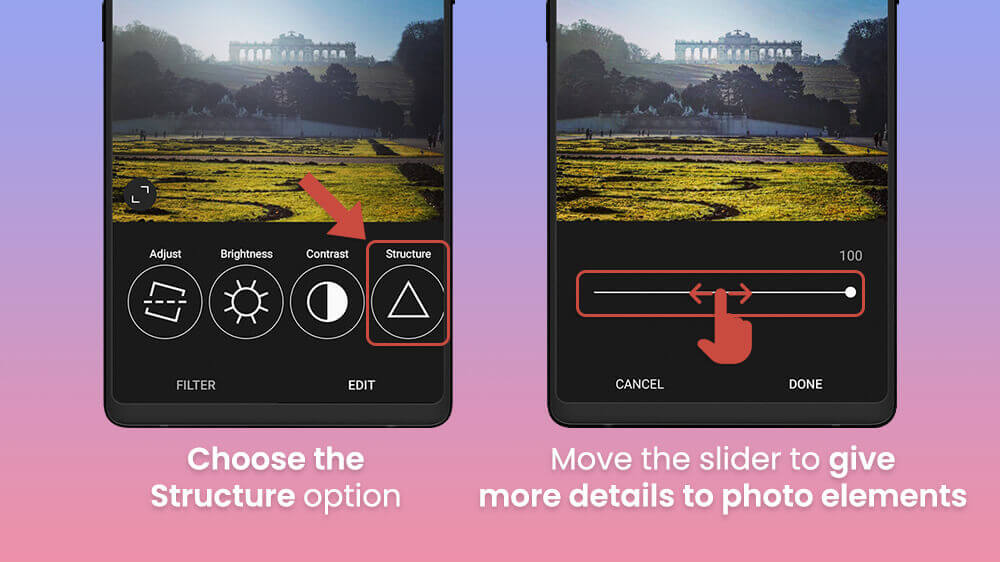
Following that, we have the Structure button for giving more detail to elements in your photo.
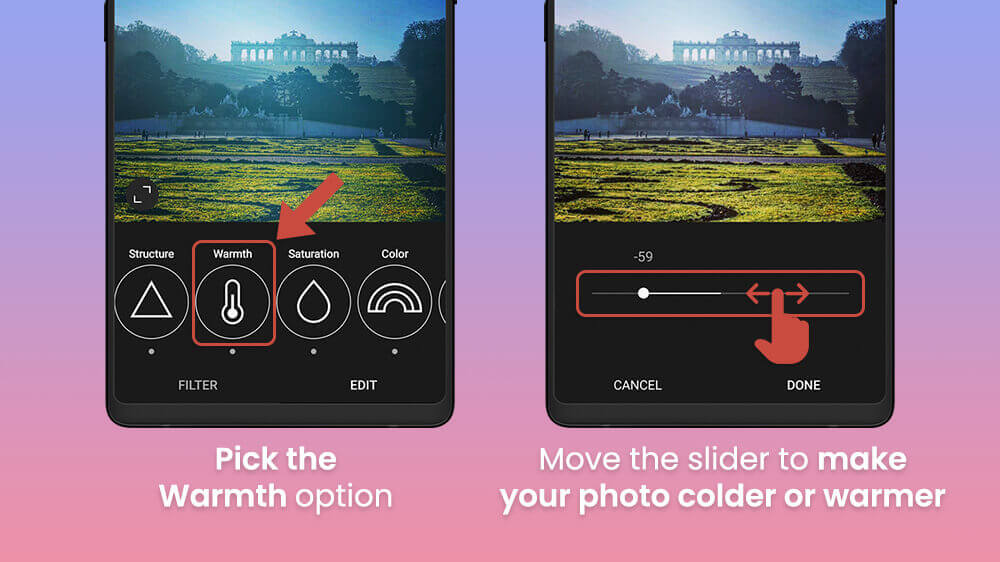
As we slide to the other options we have the Warmth menu to make the colors of our photo colder or warmer with the slider.
Next up is the Saturation button to increase the vibrance of colors in your photos.
Moreover, tapping the Color button will give you various options to make your photo pronounced with a specific color you choose.
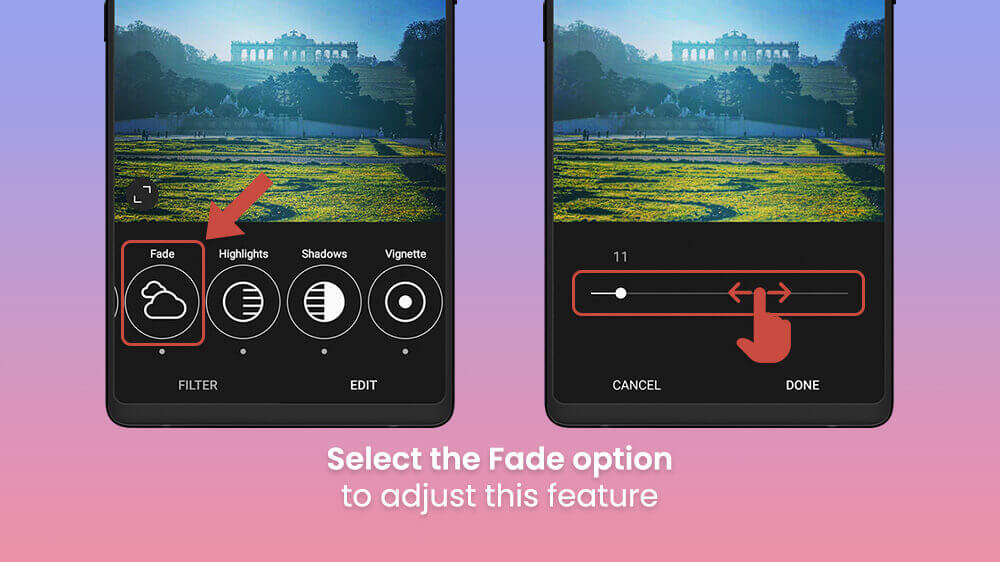
Slide the options further to the right for the Fade button that allows you to adjust this feature.
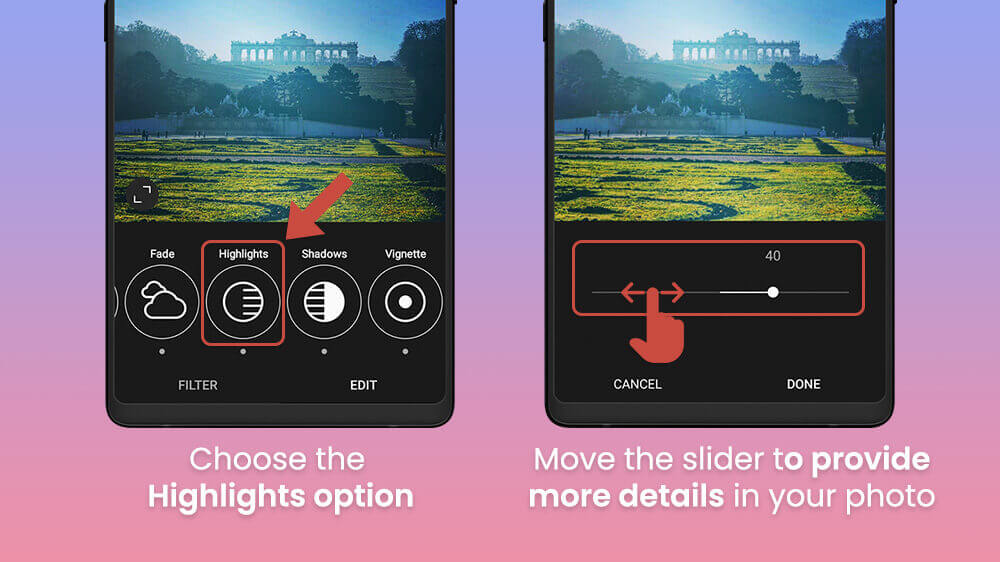
The Highlights option will provide more detail to some aspects of your photo as you move the slider.
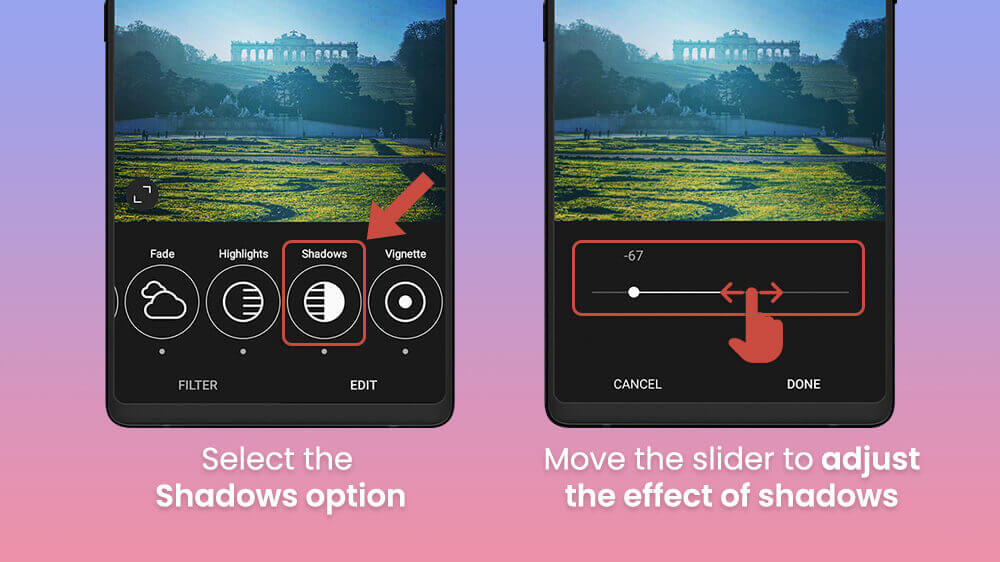
Moving on we have the Shadows menu to adjust the effect of shadows in your photo.
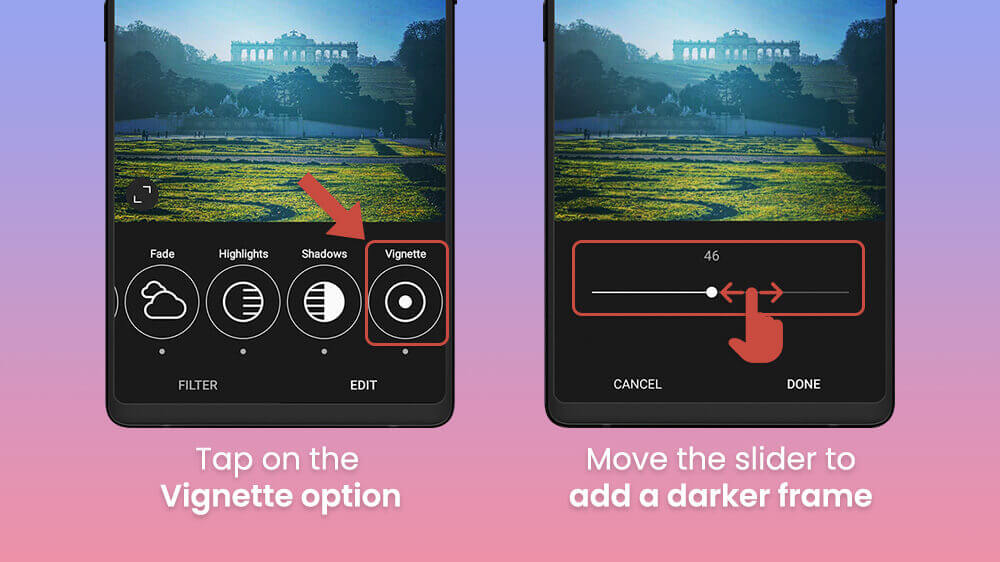
The Vignette button will give you the option to add a darker frame to your photos.
Similarly, as you slide to the end of the Edit section, the Tilt Shift button will allow you to add shadows on certain parts of your picture.
Lastly, the Sharpen button blurs or sharpens your photo to suit your needs.
That concludes the Editing section.
Conclusion
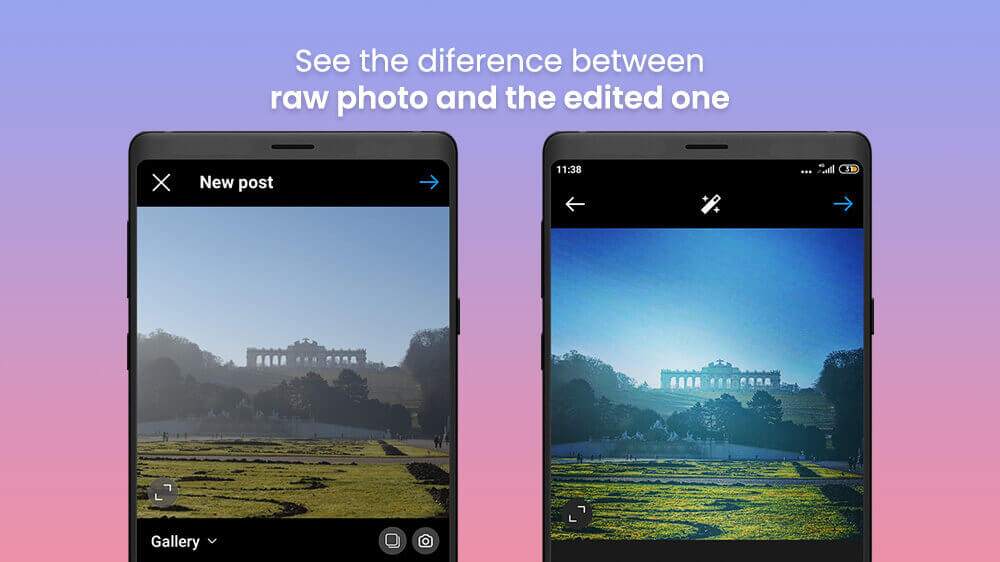
Once you are finished with the options, you can always go back through them again to check if you have missed some detail. You can alter any option at any time through the editing process. Just from our example of adjusting a few random sliders haphazardly, you can see the difference between a raw photo and an edited one.
We’re not saying it’s perfect but it gives you an idea of what you can do with the editing section. You can go as light on the adjustments or as heavy as you want. Find your own style that you like and channel your creativity. Once you are happy with your photo, simply tap on the blue arrow iconin the top-right. You can then fill in the details and post it on your profile.
We hope this Instagram photo editing walkthrough has been helpful. As you can see the process is quite simple and it can make a world of difference. Feel free to edit your photos however you like them. At the end of the day, it is a journey where you are constantly improving. You can always check out some popular third-party editing apps once you are comfortable. Creating quality photo content makes it easier to later boost them or post them as Stories thus growing your audience engagement and followers.
If you are interested in more social media tutorials, check out more of our Instagram,TikTok, and Facebook guides.